I love my Logitech G29 racing wheel, but I do have a major criticism; no handbrake! Seriously guys, come on- you’ve put so much effort into designing a wheel, pedals including clutch, an H-pattern shifter…why did you leave out a handbrake? Luckily a handbrake is about the easiest driving accessory possible to make- again Logitech, why…
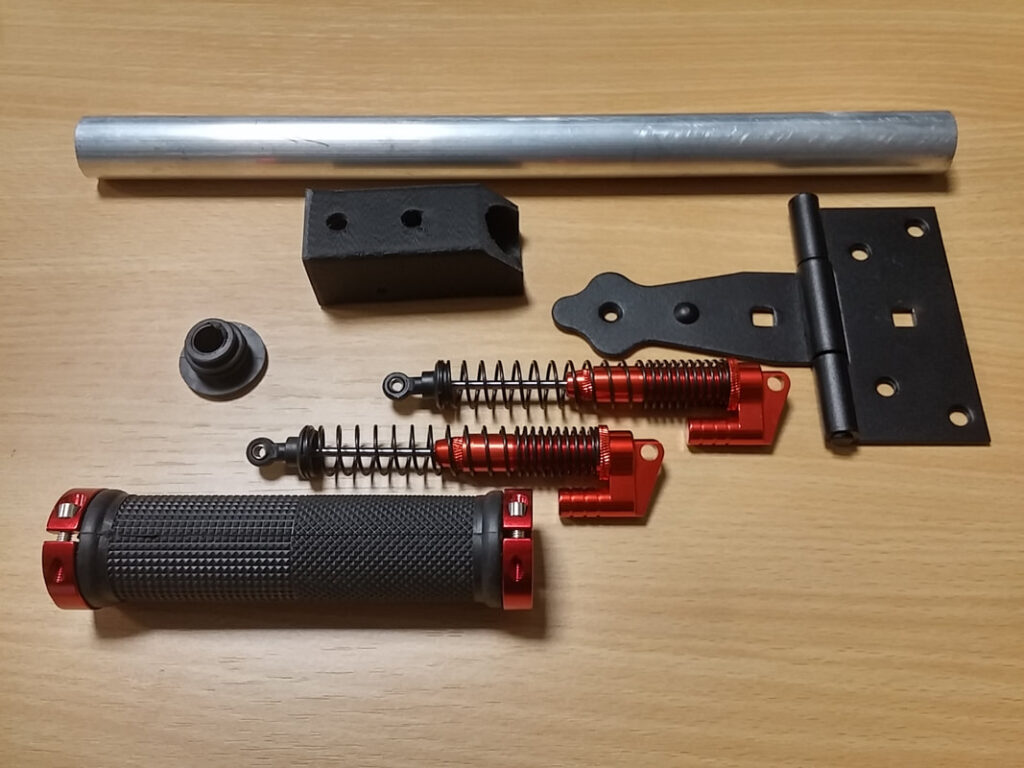
I wanted to create a rally/drift inspired vertical hydraulic handbrake. I could have bought a real one and modified that, but I wanted to make myself something a little different. My E-brake comprises the following components:
Mountain Bike locking grip with anodised ends
7/8″ diameter aluminium tube
120mm 1/10 scale RC shock absorbers
Heavy-duty T-hinge
3D printed bracket
Small neodumium magnet
Allegro A1120 hall effect switch
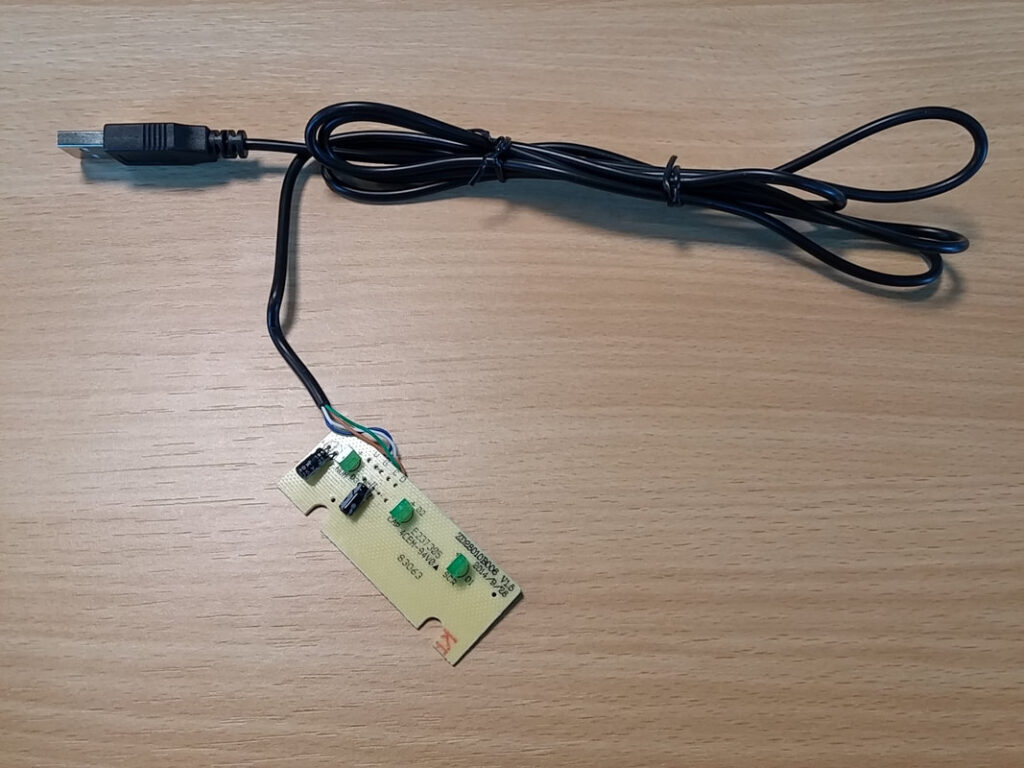
USB keyboard (I sacrificed an Advent K112)
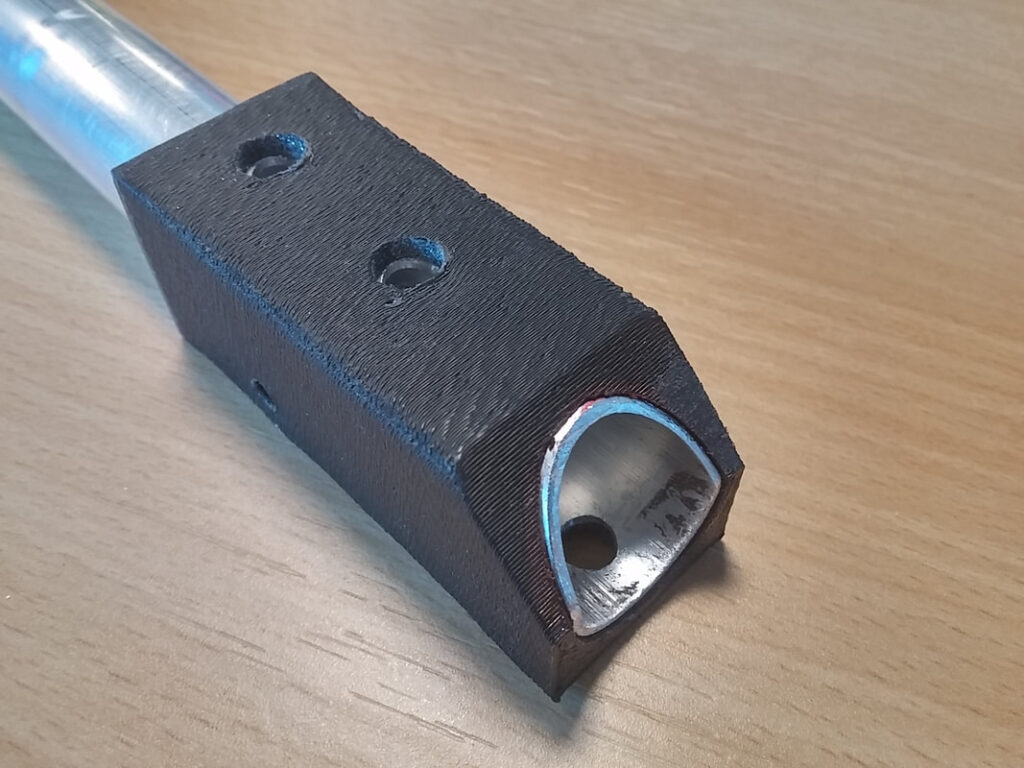
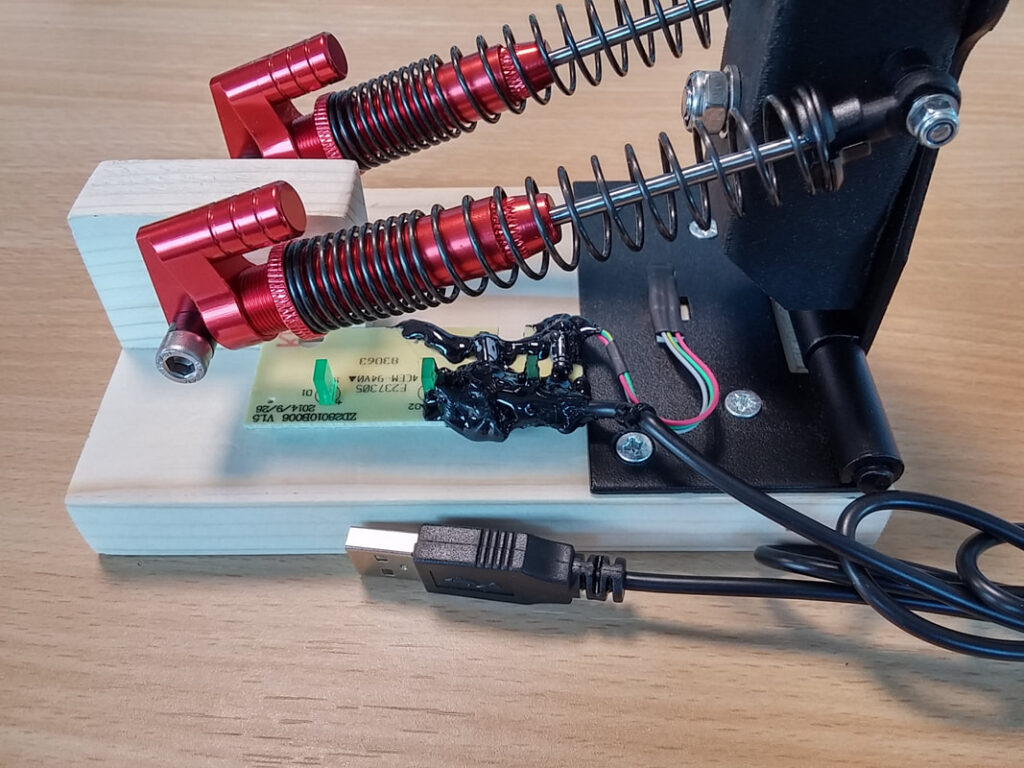
The 3D printed bracket was designed to allow easy and secure mounting of the handbrake shaft to the hinge and the shock absorbers. The trailing edge of the bracket was bevelled to prevent fouling against the hinge, increasing the range of motion. The aluminium tube was polished with brasso to improve the appearance.
The A1120 hall effect sensor outputs a logic low in the presence of a south magnetic field. Correct operation with the chosen magnet was first verified, and the south face marked with a permanent marker. Once the position of the magnet was decided upon, a blind hole was drilled and the magnet was glued in place.
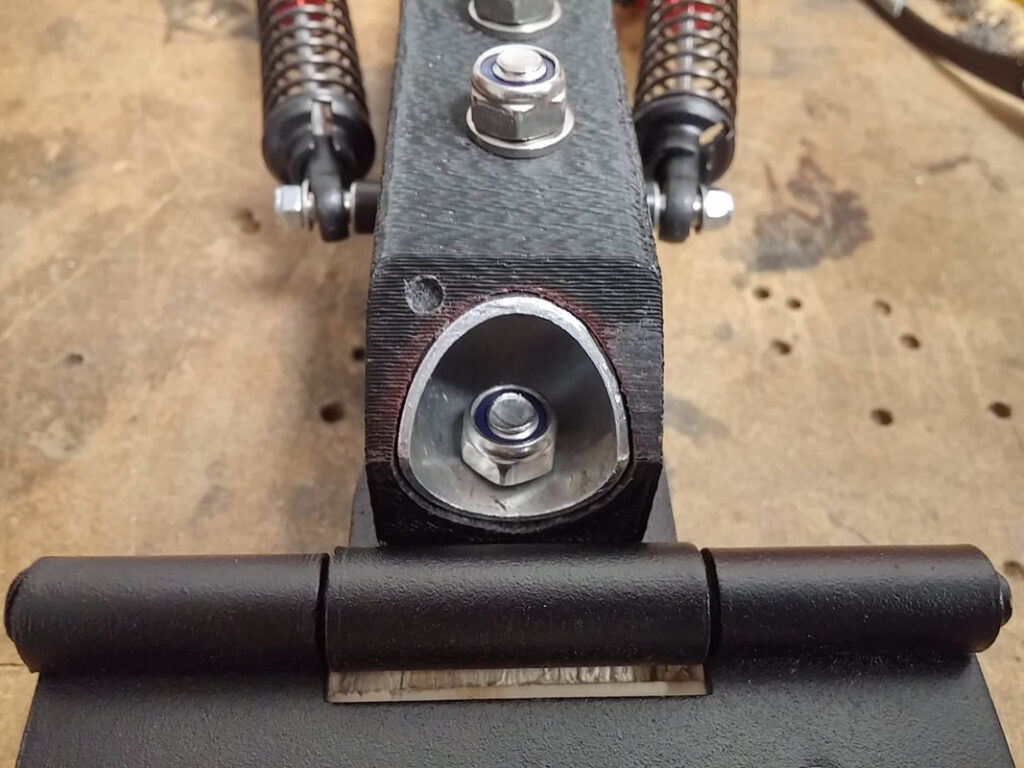
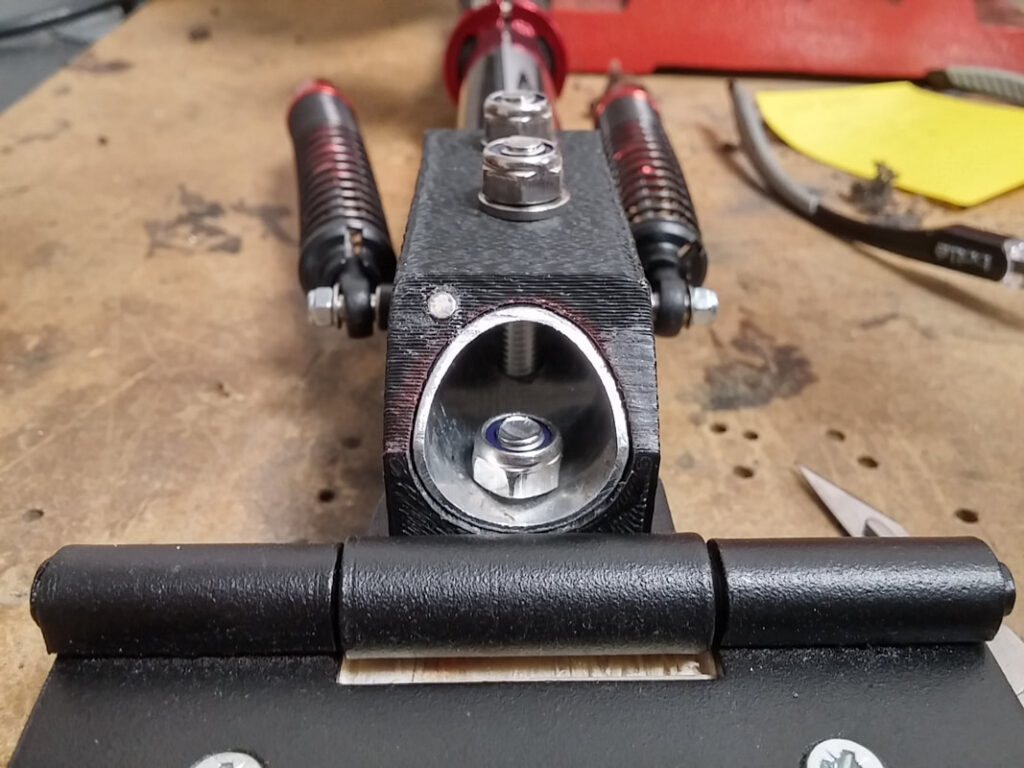
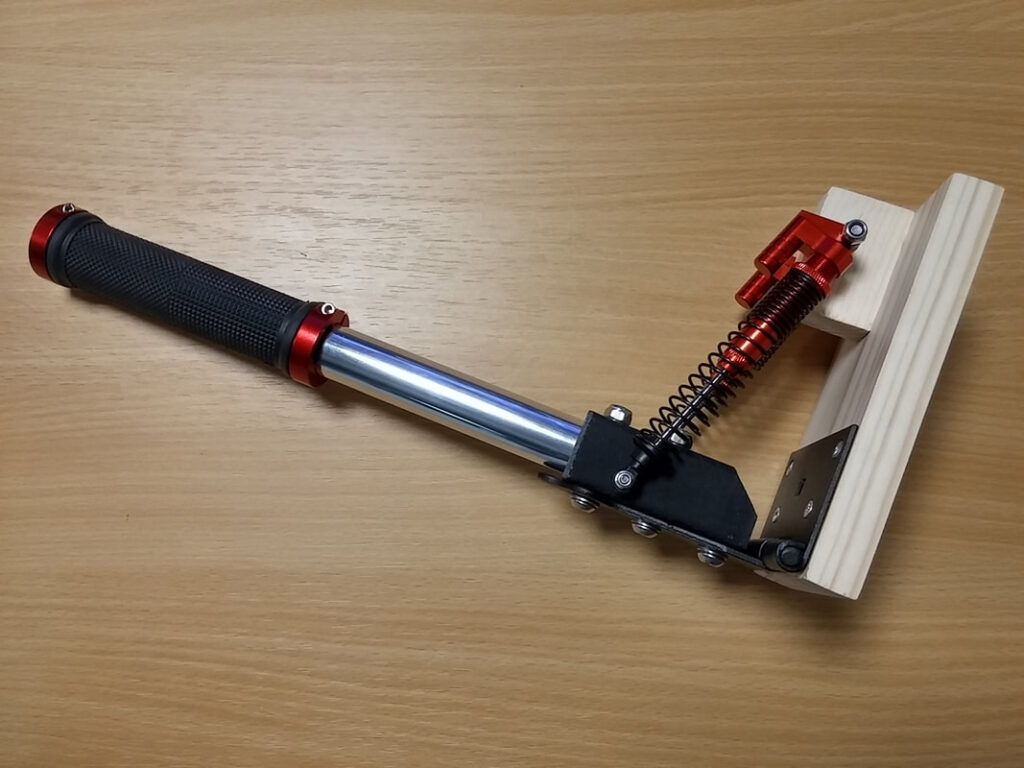
The finished mechanical assembly. Custom spacers were made on a lathe to ensure that the shocks were aligned correctly and didn’t make contact with the 3D printed bracket or base.
I decided to map the handbrake to the spacebar. I ripped the controller from an Advent K112 USB keyboard, and traced the matrix for the spacebar connections. If you would like a more detailed explanation of how I did this, have a look at how I made my Sequential Shifter.
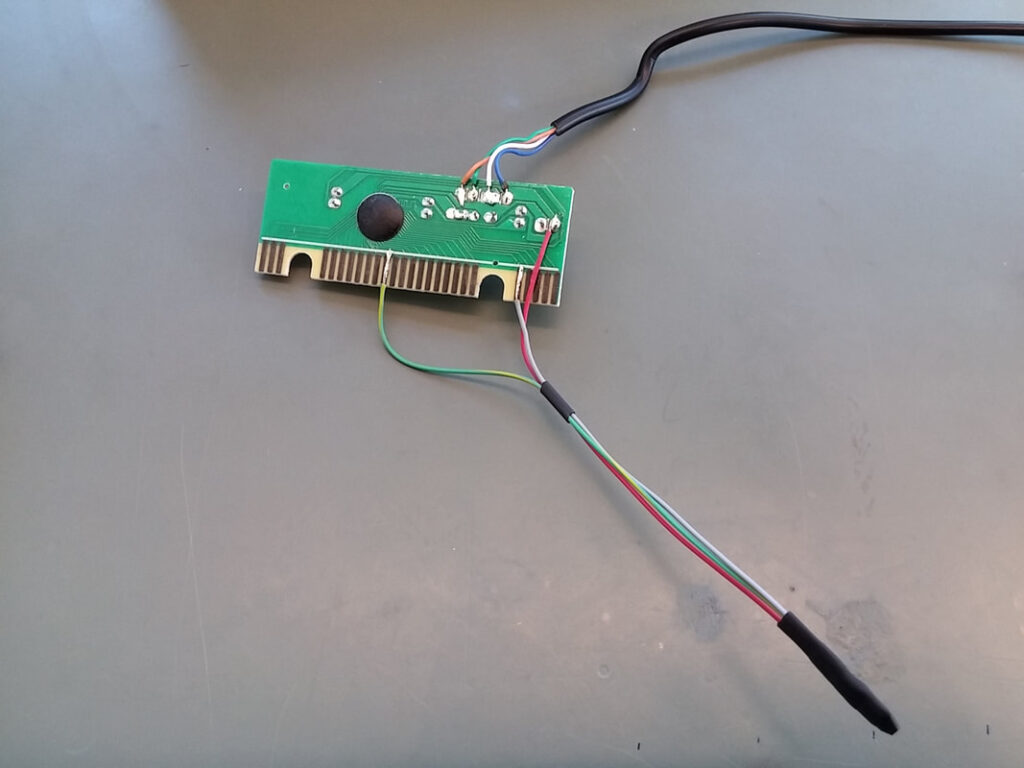
The conductive carbon ink used on the contacts provides a corrosion resistant, environmentally stable finish that allows a reliable solderless connection between this board and the two keyboard matrices. To solder to the underlying traces, the carbon must be scratched off to expose the bare copper. The A1120 is functionally equivalent to a keyboard key and so can be used as a direct replacement, with a little care… Vcc (red wire in picture) was taken directly from the positive leg of the input smoothing capacitor. One of the matrix pins was always 0V; GND (green/yellow wire in picture) was connected to this. The other pin was connected to VOUT (grey wire in picture). Testing this yielded a space every time the A1120 was put in the presence of a south magnetic field.
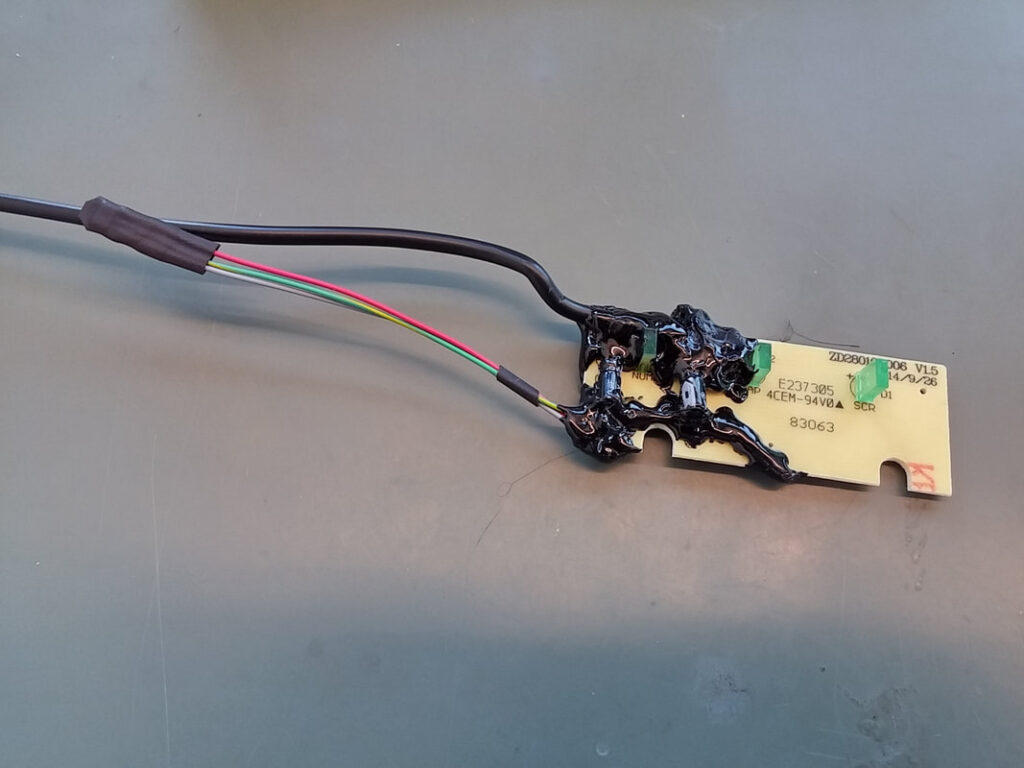
The wires around the hacked keyboard PCB were zip-tied and encapsulated in hot melt glue to provide strain relief; the wires are thin and there is not much solder contact… The optimum position for the A1120 was found and it was stuck in place using double sided foam tape.
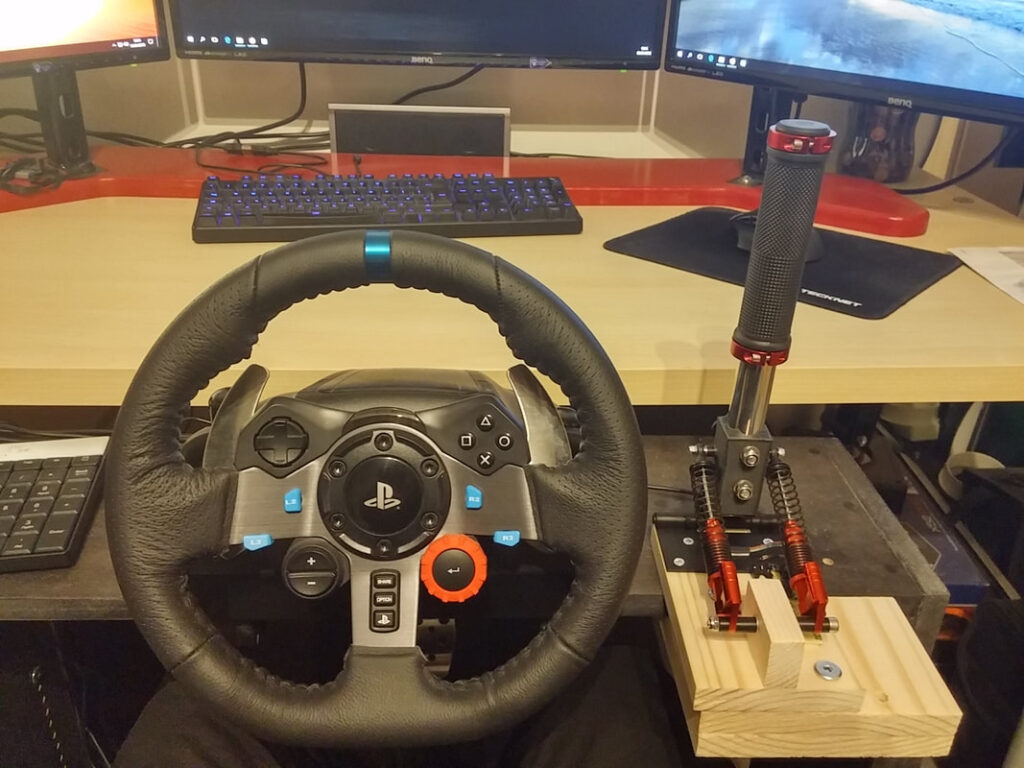
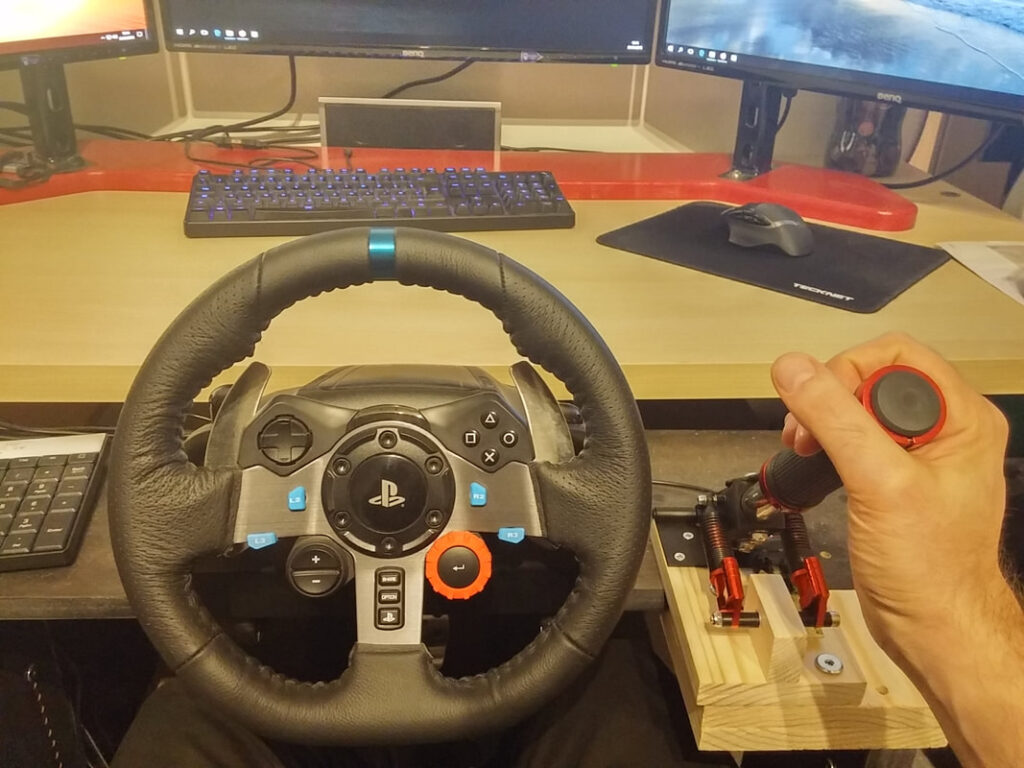
The finished handbrake, mounted on my wheel stand. I like the way it looks and more importantly, the way it performs. I trimmed the shaft down as it was way too long initially. The handle is comfortable and the oil-filled shocks provide adjustable spring preload, although I found that it performed better with this on the minimum setting. If I were to split hairs I would say that the rebound is too fast, but I could probably solve that by moving up to a heavier weight shock oil. The PC recognises the handbrake as a USB keyboard, so after mapping it to the spacebar it works flawlessly. I have used the Arduino Pro Micro Keyboard HID library and had mixed results; it seems to work fine in Windows/Linux, but is not always recognised in-game. I’ve had no such issues with the USB keyboard PCB hack, so I think I’ll use this method again for future accessories.