I wanted to add some orange reflective rim tape to the Grom to give it a bit of individuality and also help increase visibility in poor weather and at night. I chose orange because I really like the orange and black paint colour scheme that Honda have used a few times over the years, and it would also match the orange panels (see my separate post about panel wrap), orange indicators and side reflector, making them stand out less against the black bike.
It was easy to find pre-cut reflective rim tape in a multitude of colours for larger wheels but I found that for the Grom’s little 12” wheels the colours seemed to be far more limited. I decided that I would make my own – how hard could it be!? I researched what material to use and found 3M Scotchlite 580 reflective vinyl tape, which is resistant to UV, petrol and hydrocarbons and has a durability of up to 8 years. This reflective tape is used on vehicles, and is very reflective- exactly what I was looking for.
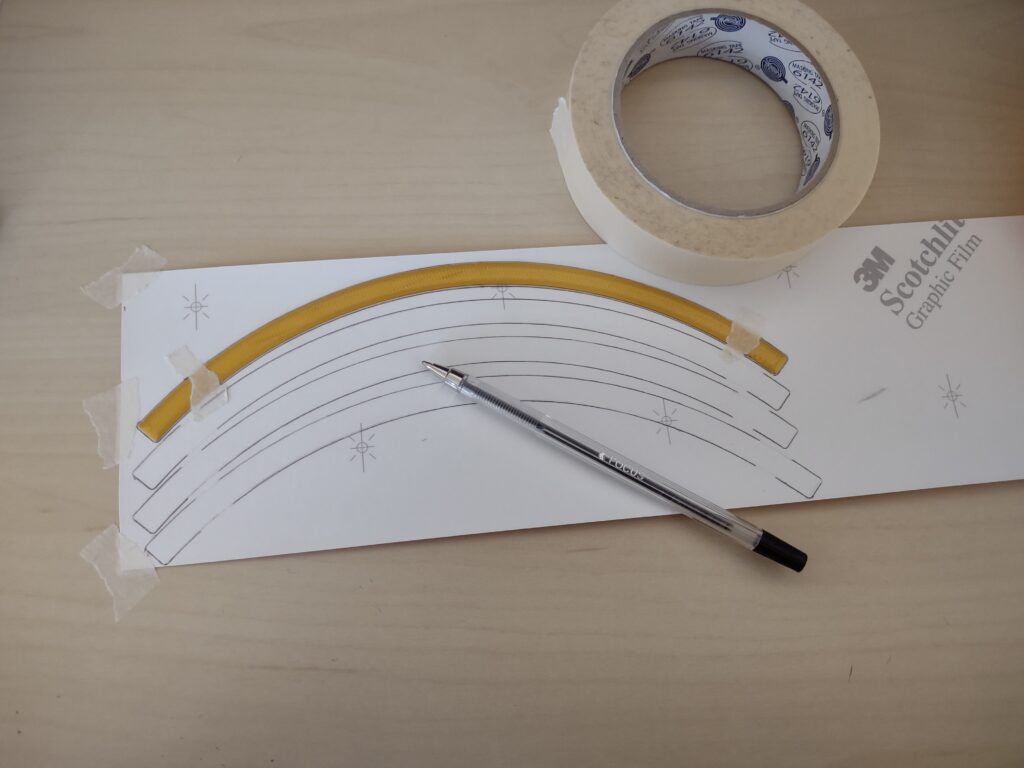
In order to ensure that I had the correct radius for the strips, I 3D printed a thin template and tested it against the wheel for fit. After a couple of attempts it was perfect. I contacted a couple of companies I had previously used who specialise in cutting out vinyl graphics and asked them if they work with 3M Scotchlite. Unfortunately, none of them held stock of the orange colour, so if I wanted that I would have to buy a whole roll which was eye-wateringly expensive!
I looked for another way round and found a company called Reflective Supplies which sells strips of 3M Scotchlite 580 on a roll, so I could buy all I needed and extra for ~£10. Perfect. I would just cut the strips out myself.
My plan was to use a pencil to draw round the template, and I could erase the lines if I made a mistake. I ended up needing to use a pen because I couldn’t really see the pencil lines on the backing paper- that raised the stakes… With all lines drawn, I switched to using a scalpel and carefully cutting each strip out. If you’re thinking “that sounds like a lot of work” you’d be right- I grossly underestimated how long this was going to take!
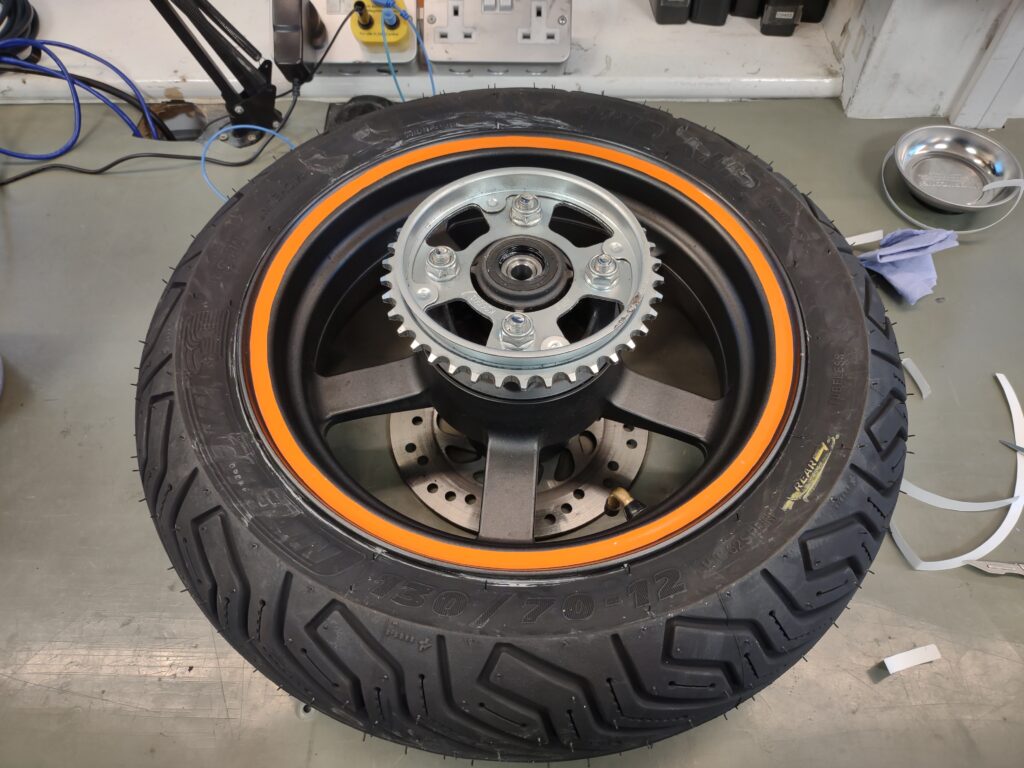
I removed both wheels from the bike and gave the sprocket a good clean with some paraffin. I removed the wheels because I was planning on getting some new tyres (the newly fitted Michelin City Grip 2 tyres are so much better than the stock tyres, particularly in the wet). With the new tyres fitted, it was time to fit the rim tape…
Side Note: If you are interested about how I made the subwoofer enclosure in the picture, check out the Audi S4 section under Vehicles in Projects.
The rims were cleaned with IPA and then the tape was applied. Care was taken to ensure that placement was consistent. Each piece overlapped the last by 5-10mm. After all the pieces were applied, the tape was heated gently with a heat gun to ensure that the adhesive was activated. The wheels were then fitted back onto the bike.
I’m very happy with how this project turned out. There were a couple of difficulties along the way, but it was worth the effort for the result. During the day, I feel the tape ties the indicators and side reflector into the black bike, making them look less like mandatory safety requirements and more like features. During darkness, the tape is very reflective, which helps increase visibility from the side. These pictures were taken after I had also added vinyl wrap accents (I have made a separate post about that- check it out), and I think these compliment each other and overall give a good balance to the look of the bike.