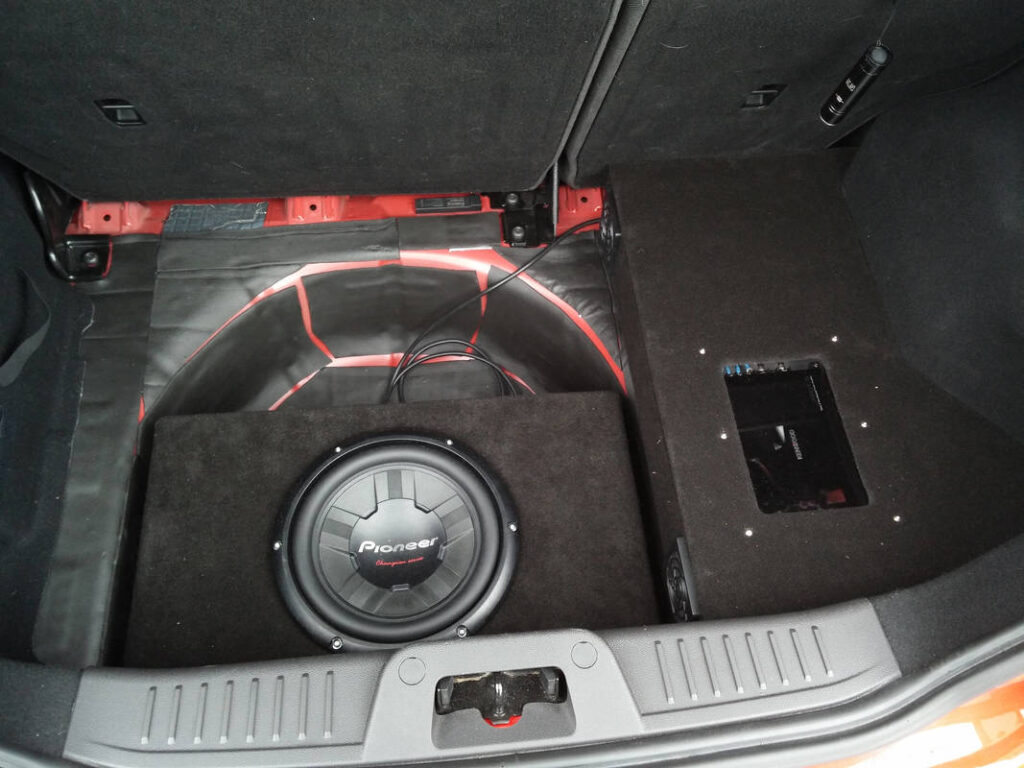
An important requirement for this build was to retain as much boot space as possible, with all audio equipment protected against damage from luggage- the car needed to remain moderately practical… After much deliberation, it was decided that the best solution would be a Pioneer TS-W261S4 Champion Series 10″ Subwoofer in a custom sealed enclosure in place of the spare wheel. A false floor with a speaker grille would be placed over this for protection, and an LED strip under the false floor would provide accent lighting through the grille. Only the design and construction of the subwoofer enclosure are covered here.
THIS SUBWOOFER ENCLOSURE DOES NOT SIT FLUSH WITH THE BOOT FLOOR; IT SITS PROUD BY A SMALL AMOUNT. THE OEM BOOT LINER MAY POSSIBLY BE USED (I HAVE NOT TRIED THIS), BUT IT WOULD HAVE TO BE RAISED.
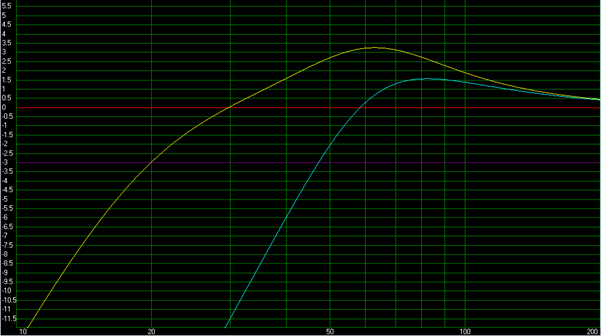
Pioneer recommends a sealed enclosure volume of 22.64 litres (not including the speaker displacement- I rang and checked), with sound absorbing material on all inner surfaces. WinISD by LinearTeam was used to simulate the response of the enclosure. A Linkwitz transform was used to model cabin gain (watch this great explanation of what cabin gain is here).
The above plot shows the -3dB point of the subwoofer/enclosure to be 20Hz after accounting for cabin gain. A final volume of 24.62l was calculated for the enclosure, after taking into account the displacement of the driver (1.22l), and the internal bracing (0.76l).
Cutting List:
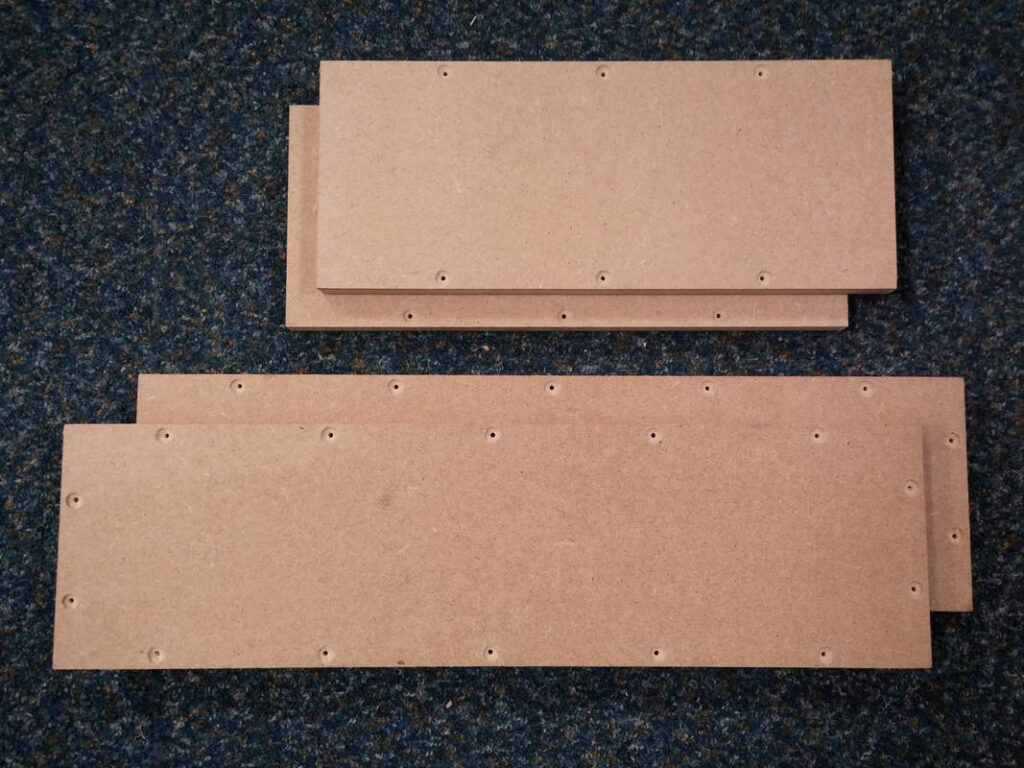
2 @ 560 × 360 × 18mm MDF
2 @ 145 × 360 × 18mm MDF
2 @ 145 × 524 × 18mm MDF
4 @ 15 × 15 × 500mm PAR Softwood
4 @ 15 × 15 × 250mm PAR Softwood
4 @ 15 × 15 × 100mm PAR Softwood
3.5 × 25mm drywall screws
PVA Wood Glue
Wood filler
Pioneer TS-W261S4 (or TS-W261D4)
Suitable speaker cable
Tesa 51608 wiring loom tape
Speaker binding posts
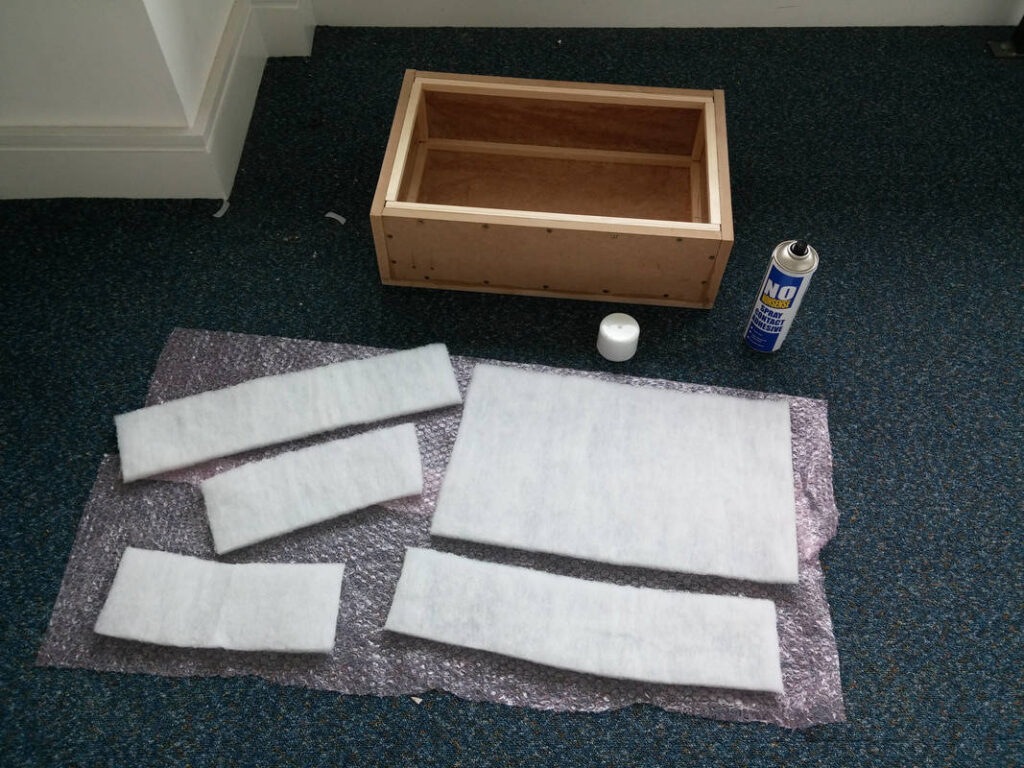
1m × 1m 6oz Polyester Wadding
OPTIONAL: Automotive Carpet
OPTIONAL: Spray Glue for Carpet
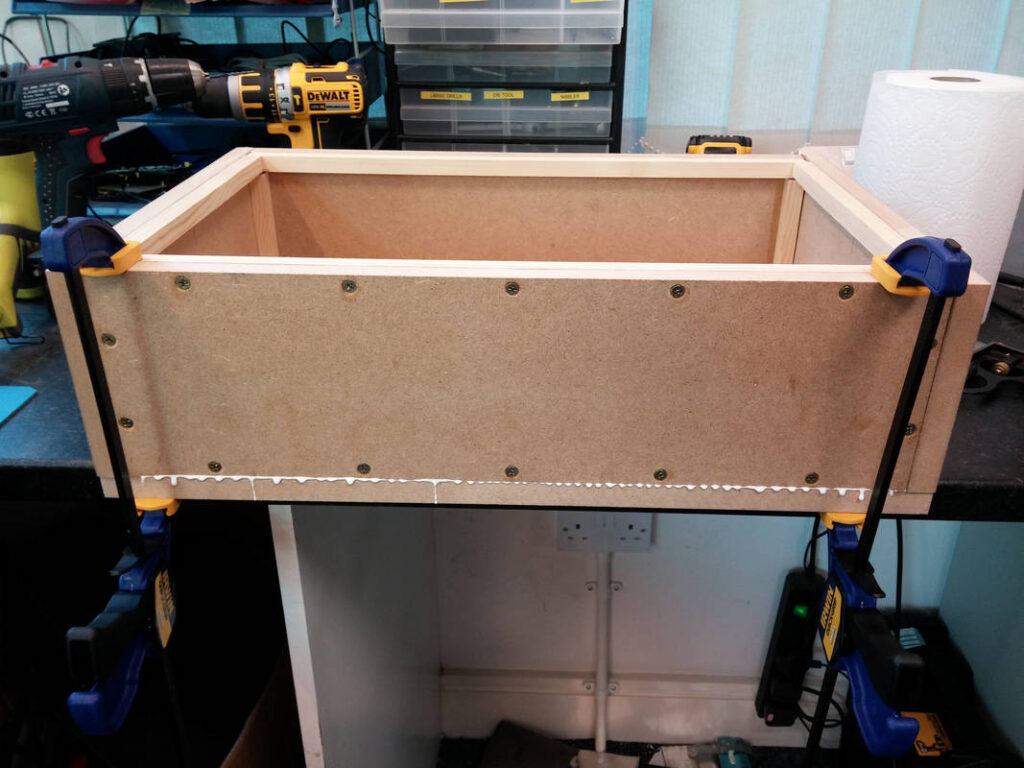
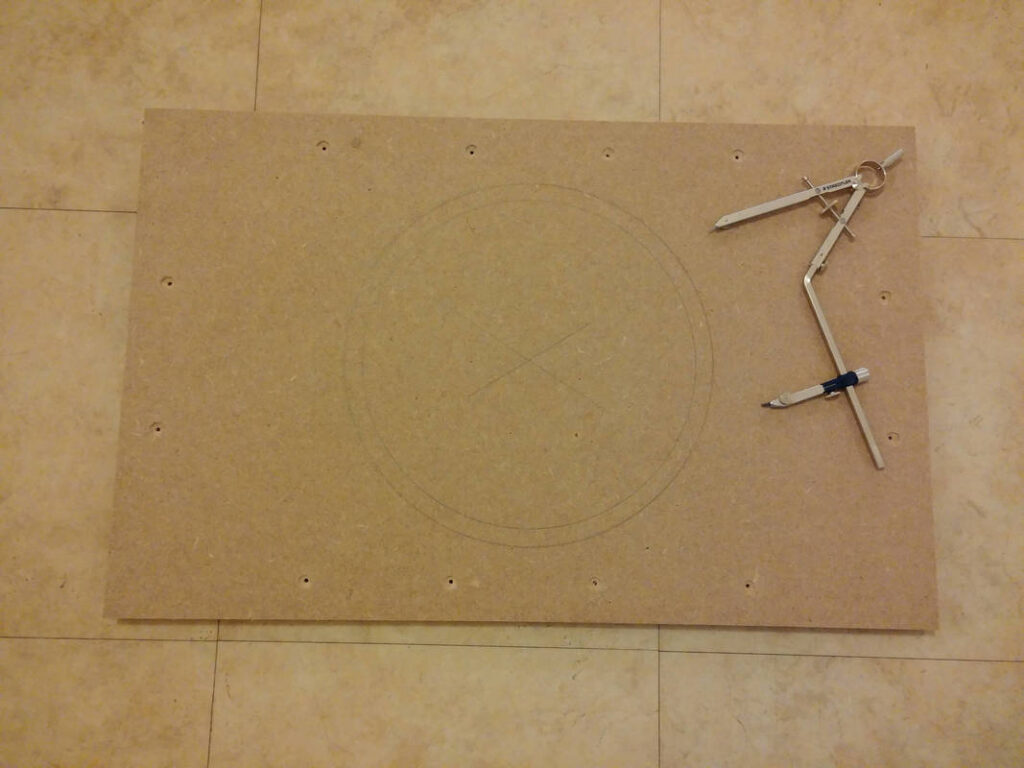
It is important that the MDF is cut on a table saw with a nice sharp blade that is square to the table. The square edges of the box will allow the pieces of the box to come together with an tight fit. This makes for a build that is quick to put together, easy to square and removes the need for fancy gap-filling adhesives. Prepare all of the parts before the build is started (the long screws in this picture were not used). Cut the PAR softwood to size and tidy up the edges. This way assembly will be quick and painless.
Mark out where the screws will go into the PAR softwood bracing. Drill 3mm pilot holes right through the MDF (85% of the screw shaft diameter, as per WPIF guidelines), and plunge the drill bit through a couple of times to ensure a clean hole. The PAR softwood does not need piloting.
Countersink and counterbore the holes using a 9mm drill bit. Drill to a depth that will place the screw heads ~2mm below the surface; these will be filled over later. A pillar drill with a depth-stop is ideal for this.
Use copious amounts of glue- it should ideally ooze out of either side of the joint when you clamp it and screw it. Place a dab of glue in each screw hole before driving the screws home; this ensures that the screws won’t vibrate themselves loose over time. Do not overtighten the screws!
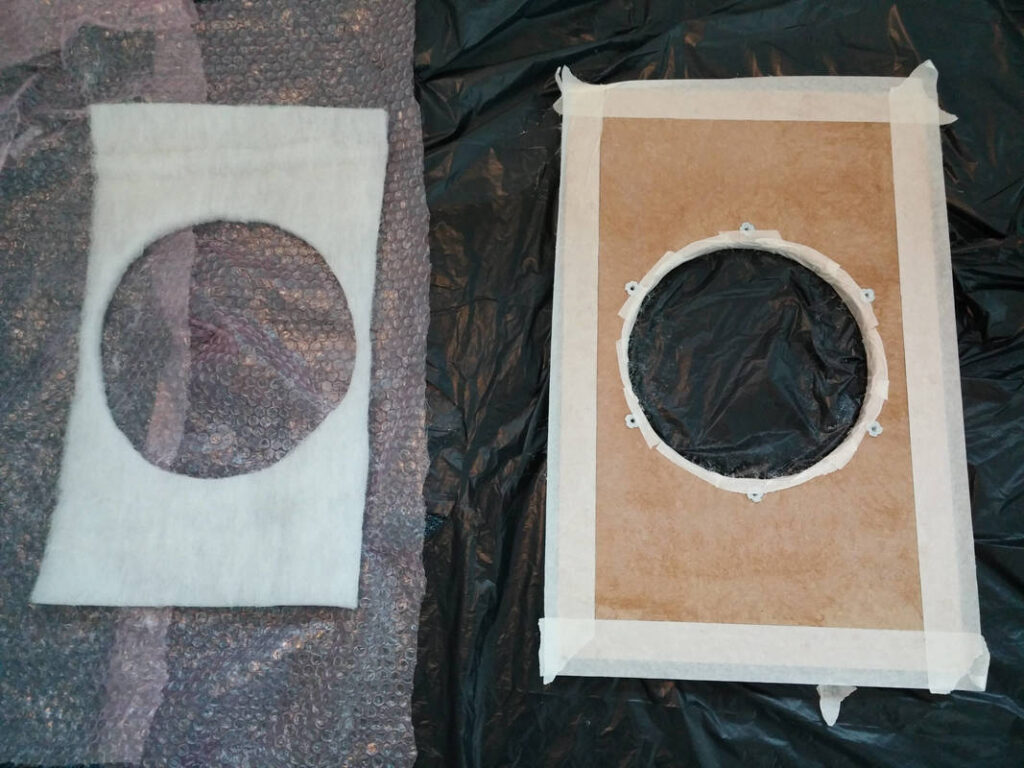
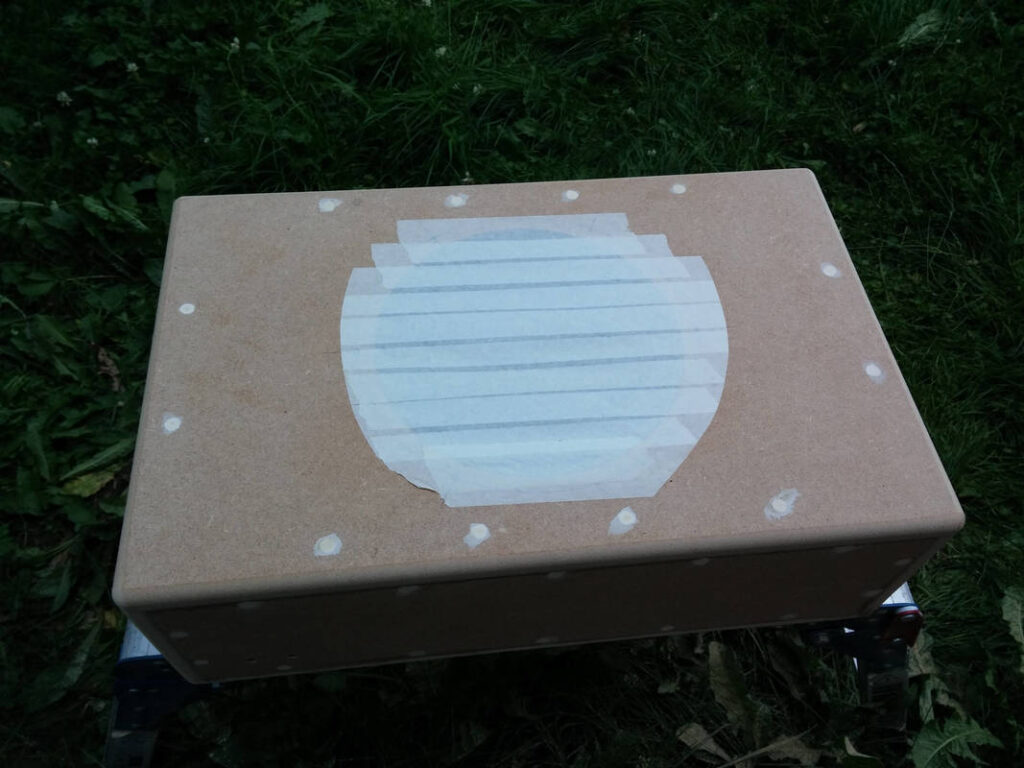
Mark out the speaker hole and screw positions (outer ring, not yet marked in this picture), and then cut out the hole with a jigsaw or router.
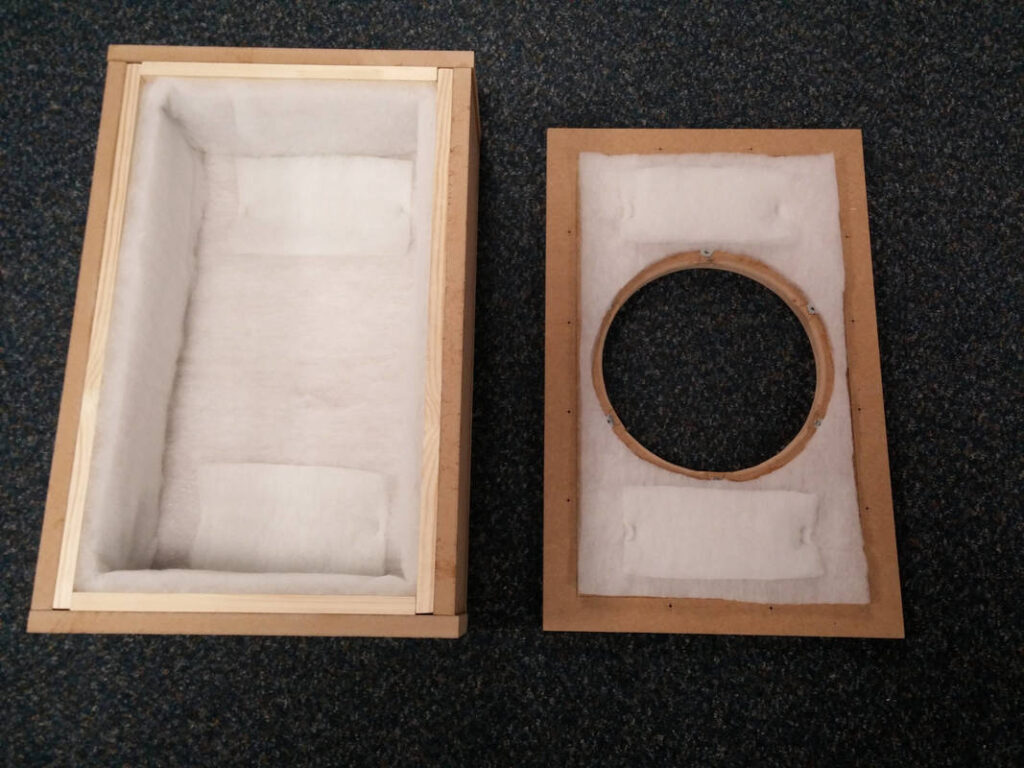
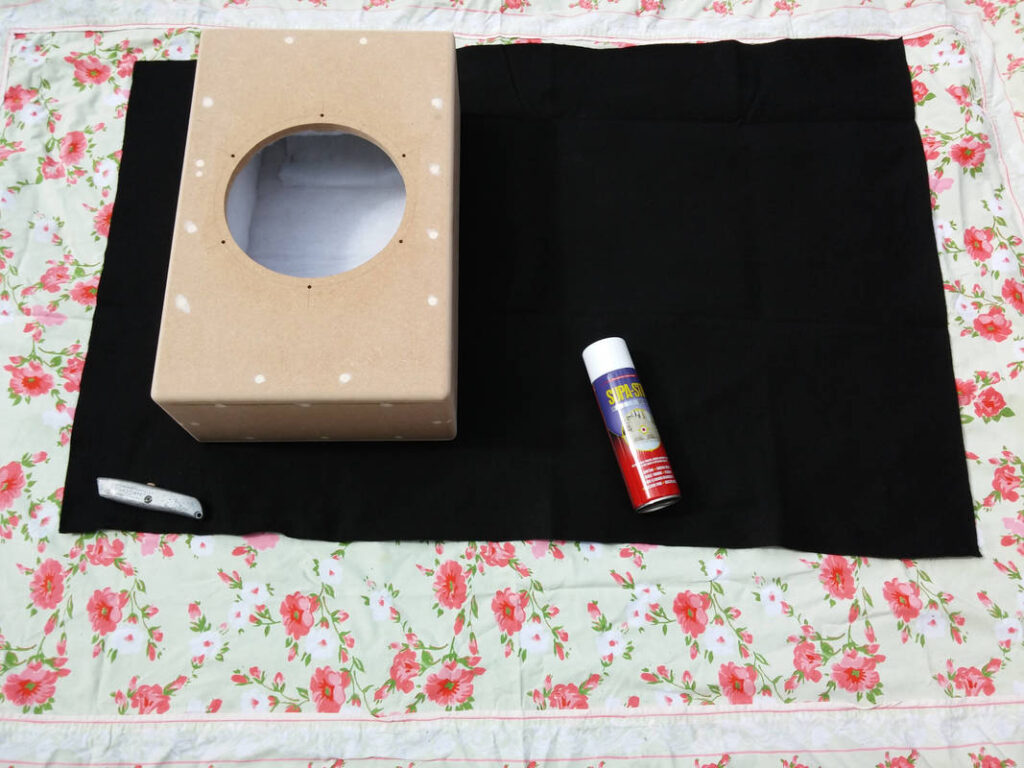
Cut the 6oz Polyester wadding and use spray contact adhesive to fix in place. I have had great results with No Nonsense Spray Contact Adhesive.
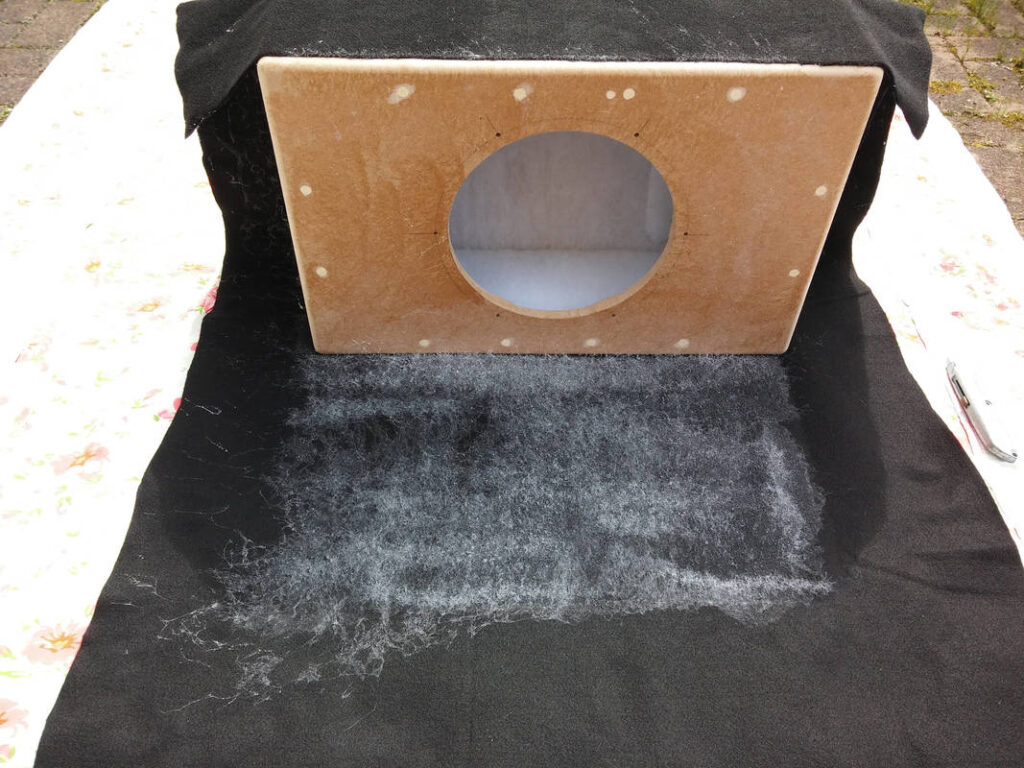
Spray glue a second layer of wadding into place. Use a heavy-duty stapler in each upright corner brace, on the lid and on the base to ensure that the wadding stays in place over the long-term.
The enclosure is nearly complete- the baffle has been glued and screwed, all holes have been filled, it has been sanded smooth with an orbital sander to 120 grit and all corners have been routed with a 1/2″ round over. The speaker hole was masked over to prevent sawdust from filling the box during sanding and routing.
After routing, give the box a final sand by hand with 120 grit then 180 grit. Vacuum the box to remove the dust. You could leave the box as it is, fit the speaker and biding posts and call it a day. I thought I would use this as a practice piece as I had never carpeted before and had a few bits to do in my boot. It didn’t matter if I messed this up as the sub would be out of sight anyway. Many tutorials on carpeting can be found online; I read a couple of them and watched a couple of YouTube videos before performing this attempt. I do not recommend the contact adhesive in the picture- the open time was too short and it made the job pretty hard! I used it because it came with the carpet, but moving forward I’ll be sticking with No Nonsense Spray Contact Adhesive.
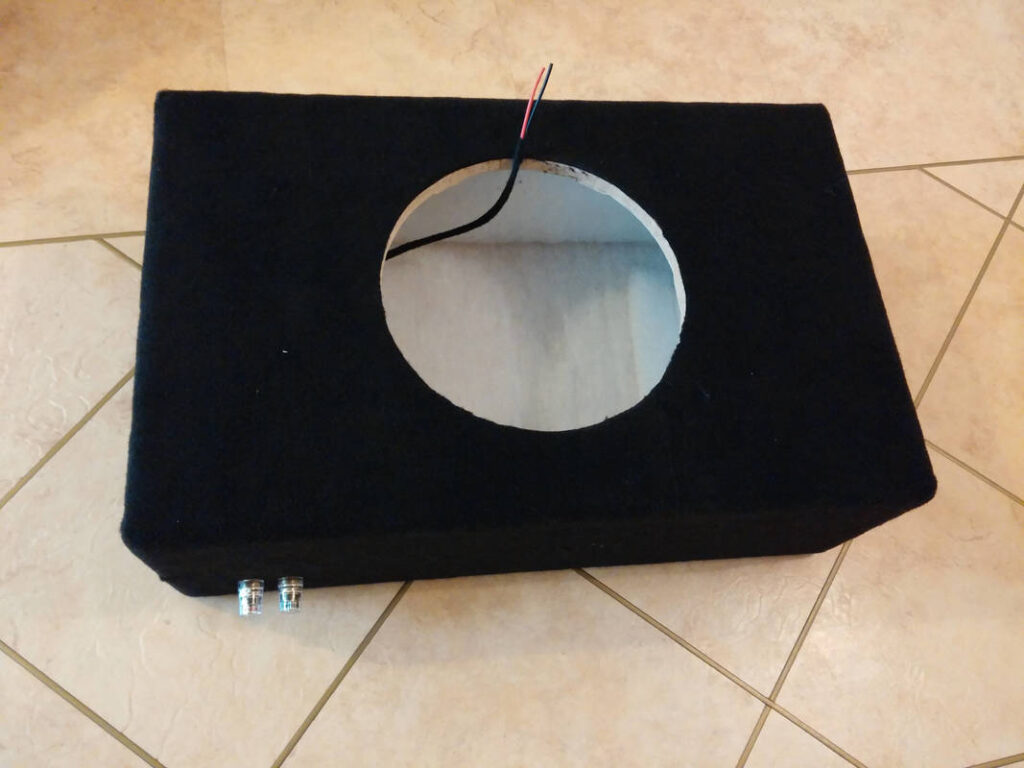
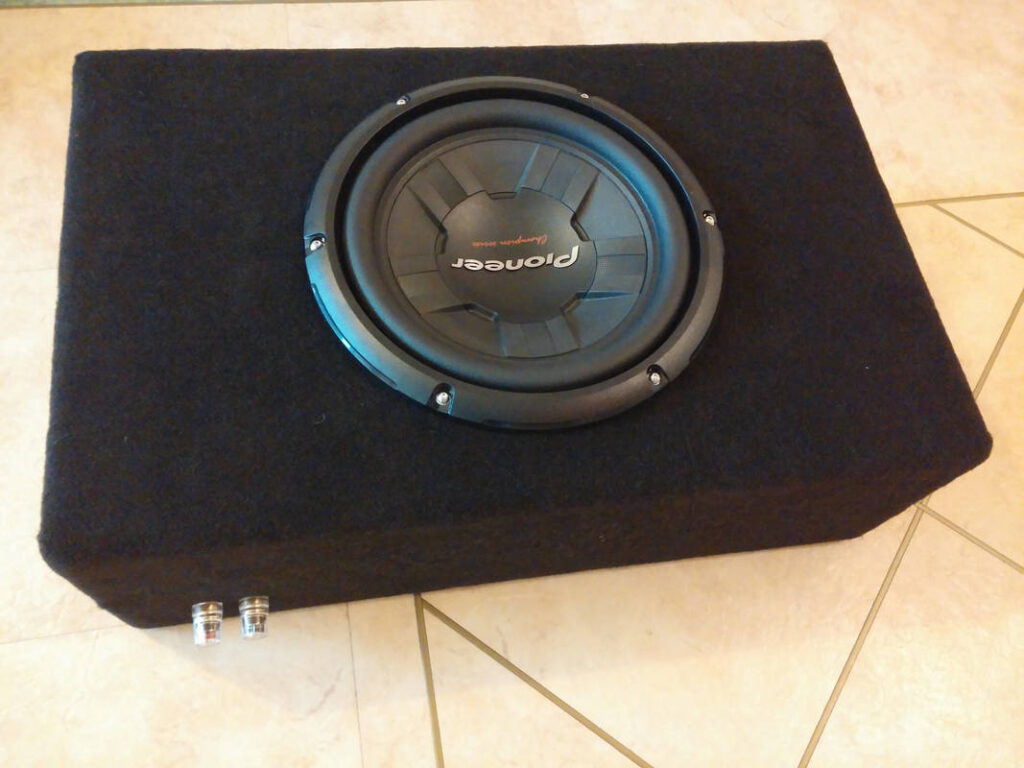
Fit the binding posts and wrap the cables in Tesa 51608 to prevent any chance of the cable vibrating against the driver basket and making noise.
The finished enclosure, with sub fitted. I’m very happy with how it turned out; it’s a shame nobody’s ever going to see it. It slots into my spare wheel like a glove and the enclosure will be hidden by my false floor, with the driver visible through the grille.