Fiesta ST - Custom RCA Cables (06/2016)
I have yet to experience a situation in approaching twenty years where a low-cost RCA cable has ever caused me a problem in a home audio situation. These cables tend to be the stranded core, twisted shield type that you can buy from eBay for ~£1. There are two situations that I can think of where this cable structure may cause an issue:
- Insufficient distribution of shield leading to inadequate shielding of the entire cable assembly.
- Tight bend in the cable causing the shield to bunch together and create a gap in the shield.
In both of these situations the environment must be noisy otherwise there will be no consequence for the compromised shielding. In a car, the noise floor is significantly higher than in the home, and I did not want to risk finding out the hard way that my cheap cables couldn’t cope. At the same time, I’m not going to let any company attempt to baffle me with claims about how their cables use NASA-approved materials to shield against interference, align electrons and add sonic presence and imaging. I did all that myself from a few bits I bought off eBay. Well, except the bit about NASA, aligning electrons and adding sonic stuff…
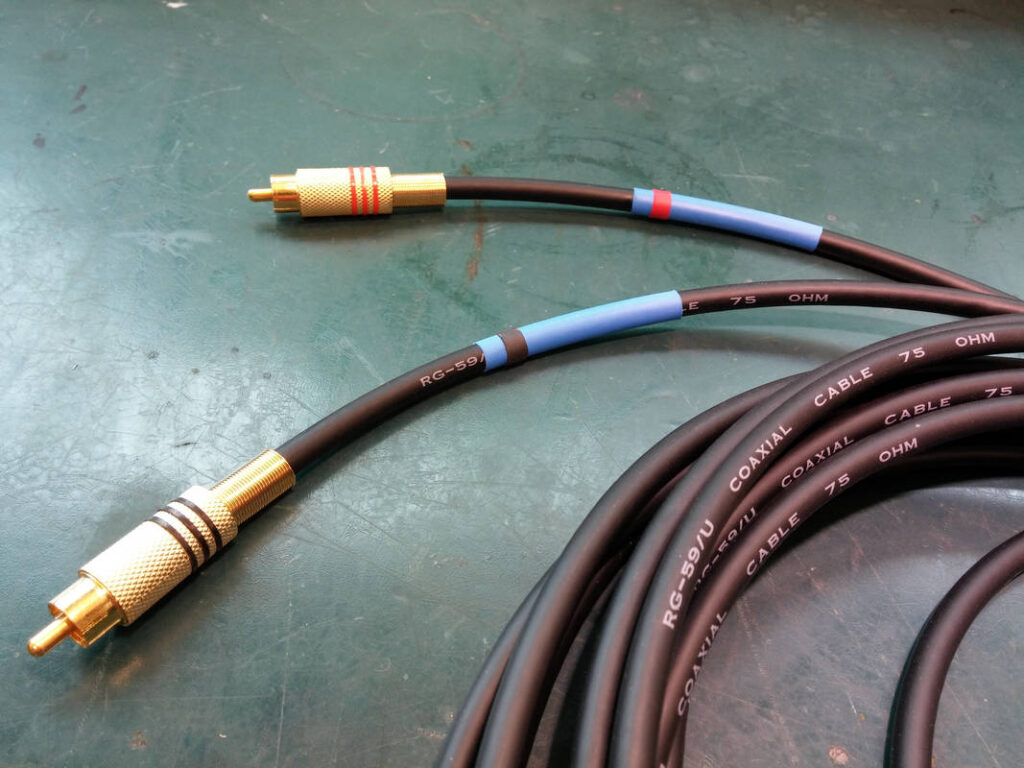
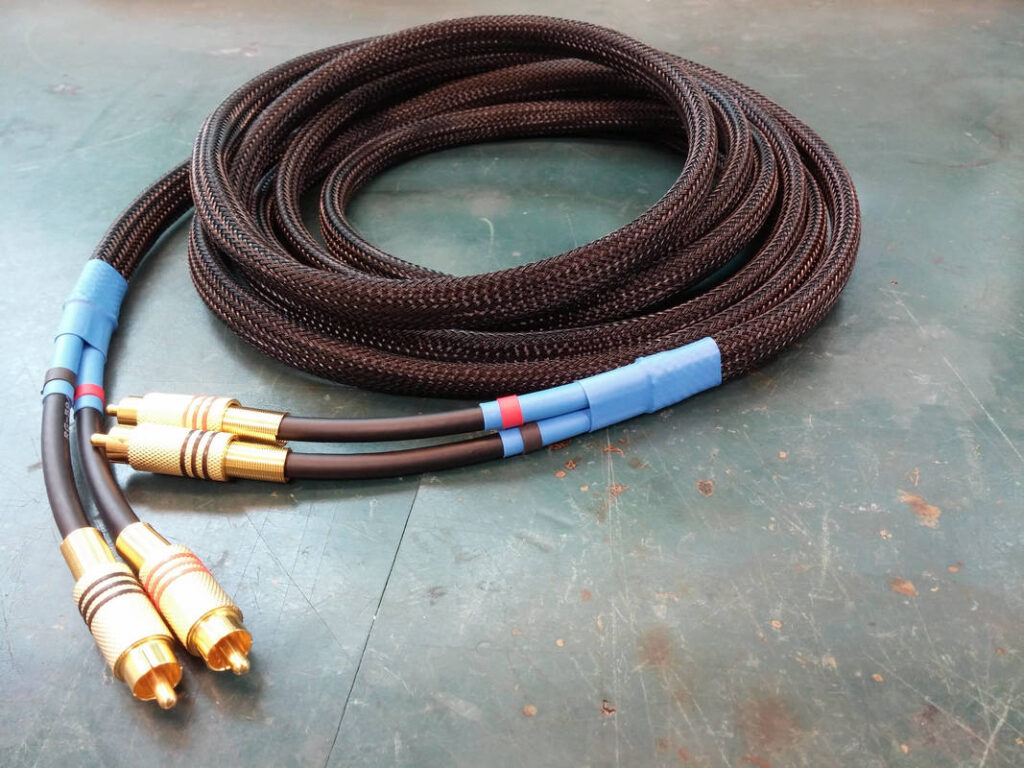
These custom RCA cables are over engineered; the cable has an attenuation of ~1dB/100m@1MHz. To put this into context, the maximum frequency that a 320kbps mp3 is able to reproduce is 160kHz, or 0.16MHz. This is way beyond the hearing range of a cat, let alone a human. For a 4m long cable the attenuation is negligible. They look the business, with heatshrink for colour-coding so I won’t need to label them when they’re installed in my car and cable braid holding the pair together nicely. Finally, gold connectors (at ~£2 for a set of 4 on eBay they’re probably not gold but I don’t care because IT MAKES NO DIFFERENCE), add a bit of bling.
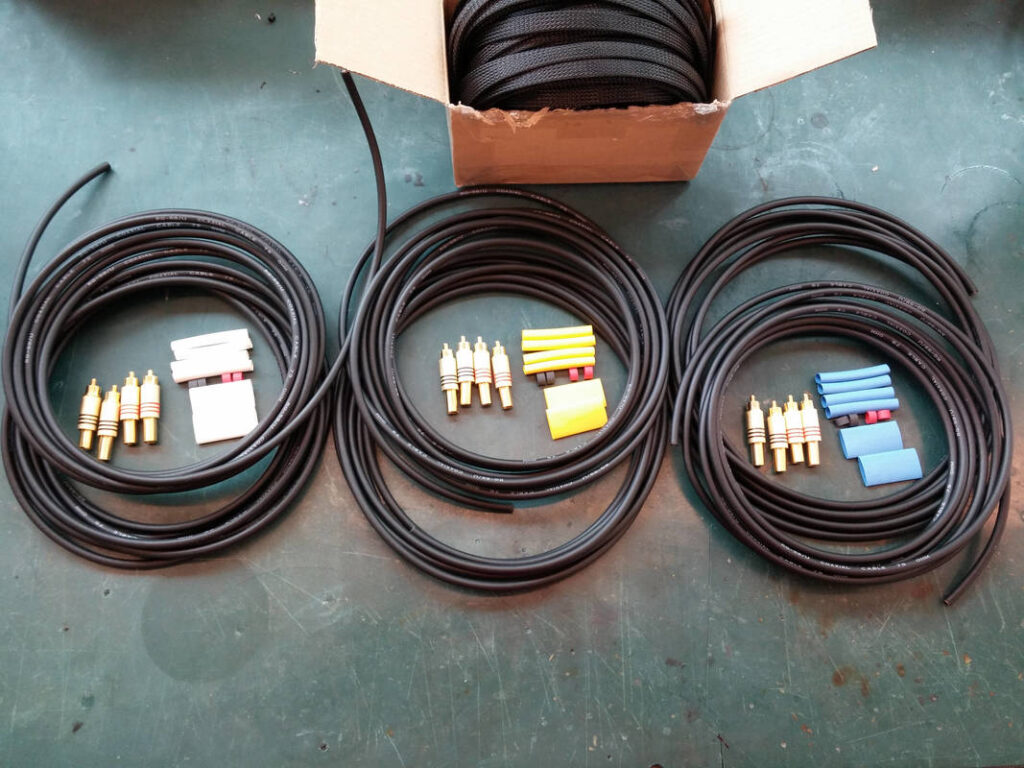
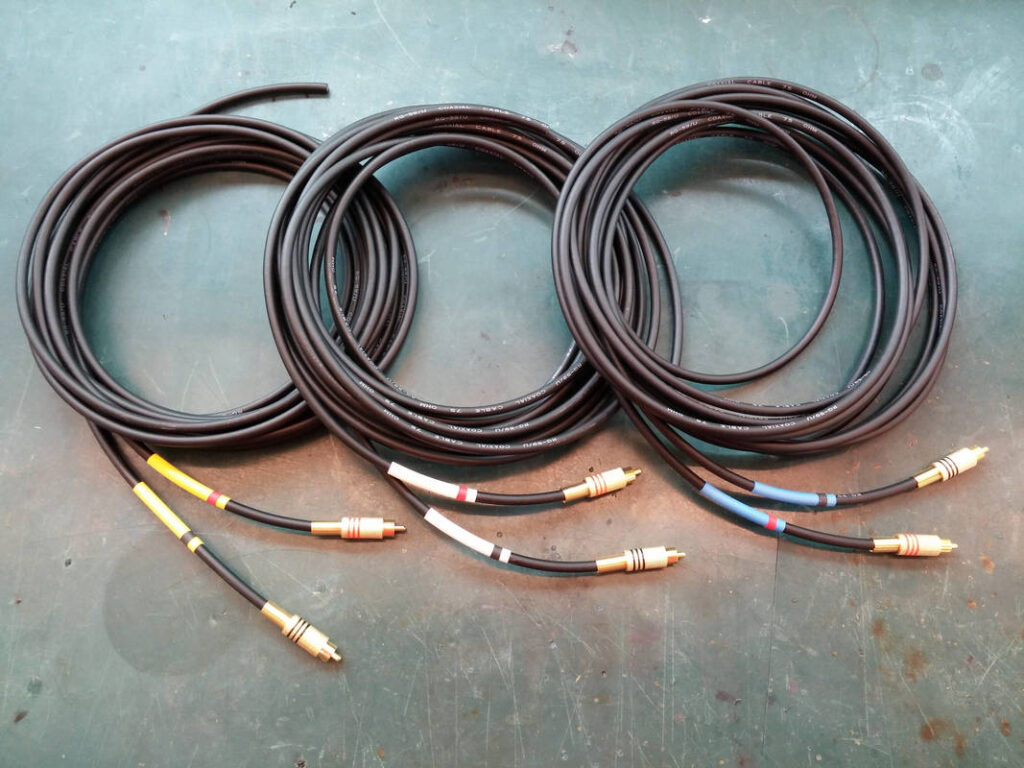
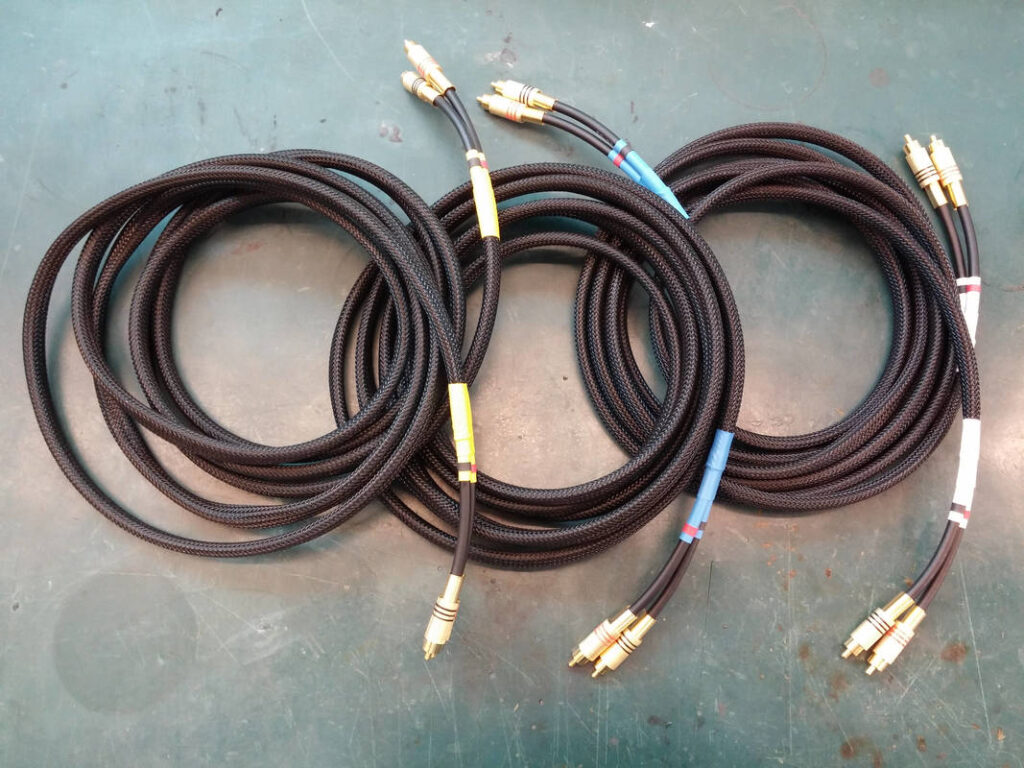
I made 3 sets of 4m long custom RCA cables for a total cost of ~£30, or ~£10 / cable or ~£2.50 / metre. After reading how I made these cables you should be able to do it too.
What makes this cable assembly better than twin core cable?
Coaxial cable (‘Coax’) offers the advantage of higher noise immunity through the continuous protection of the signal that the braided shield offers. The enhanced performance of this cable will help prevent signal integrity issues in noisy environments (eg. automotive). This cable will offer no audible improvements in low-noise environments (no cable can do that!), but it will still look cool.
NOTE: Coax has a ‘characteristic impedance’, which is very important when being used for video, high speed digital and Radio Frequency applications, but of no relevance to analog home or car audio. This is due to transmission line effects not becoming apparent at audio frequencies until cable lengths are >600m. For a detailed explanation please see: audiosystemsgroup.com/TransLines-LowFreq.pdf
Cool Story Bro. How do I make one?
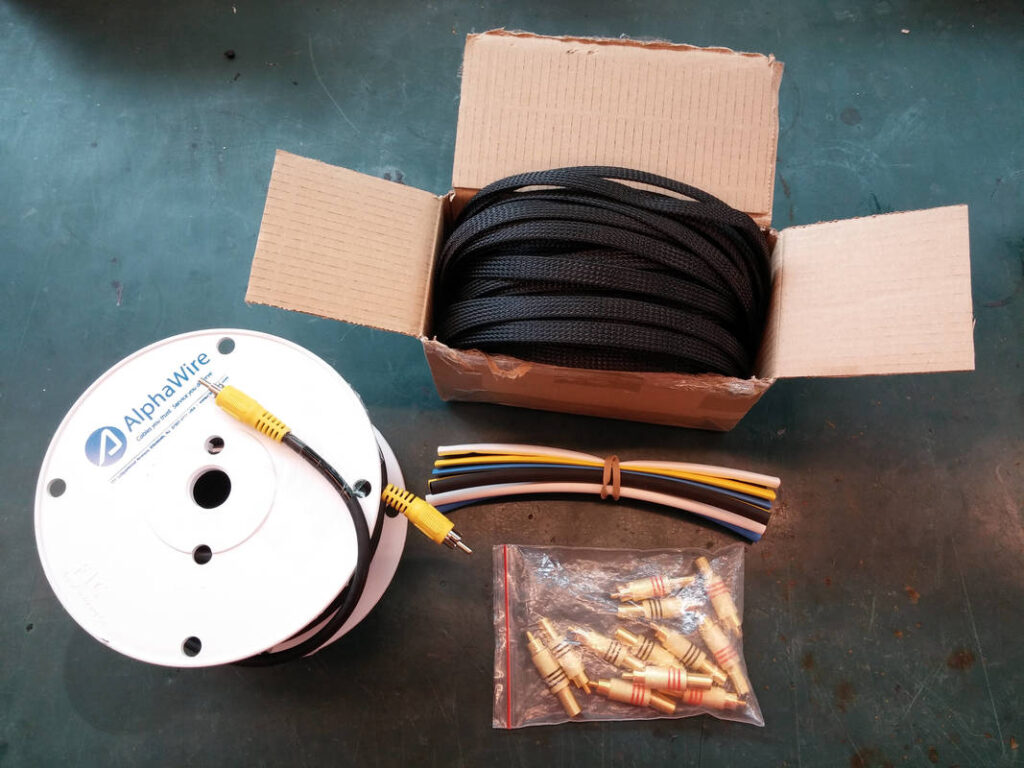
I used the following components:
- RG59 Coaxial Cable (buy one long cable…)
- RCA solder connectors
- Heatshrink:
- 18mm Ø white, blue, yellow (holds braid)
- 8mm Ø white, blue, yellow, red, black (optional, aesthetic)
- 10mm Ø braided cable sleeving (many colours available)
The coax did not come on a reel; I reeled it to make handling easier. The cheapest source of RG59 that I was able to find was CCTV video cables on eBay, at ~£11 for 25m.
Cutting all of your bits at once will ensure that they are all the same, which will make the cables look professional. Here are the lengths that I used:
- RG59: 6@4m
- Heatshrink:
- 8mm Ø white/blue/yellow: 4@50mm/colour
- 8mm Ø red/black: 6@5mm/colour
- 18mmØ white/blue/yellow: 2@40mm/colour
Don’t trim the braid yet- it gets slightly shorter when it’s expanded over the cables so you might need a longer length than you initially think!
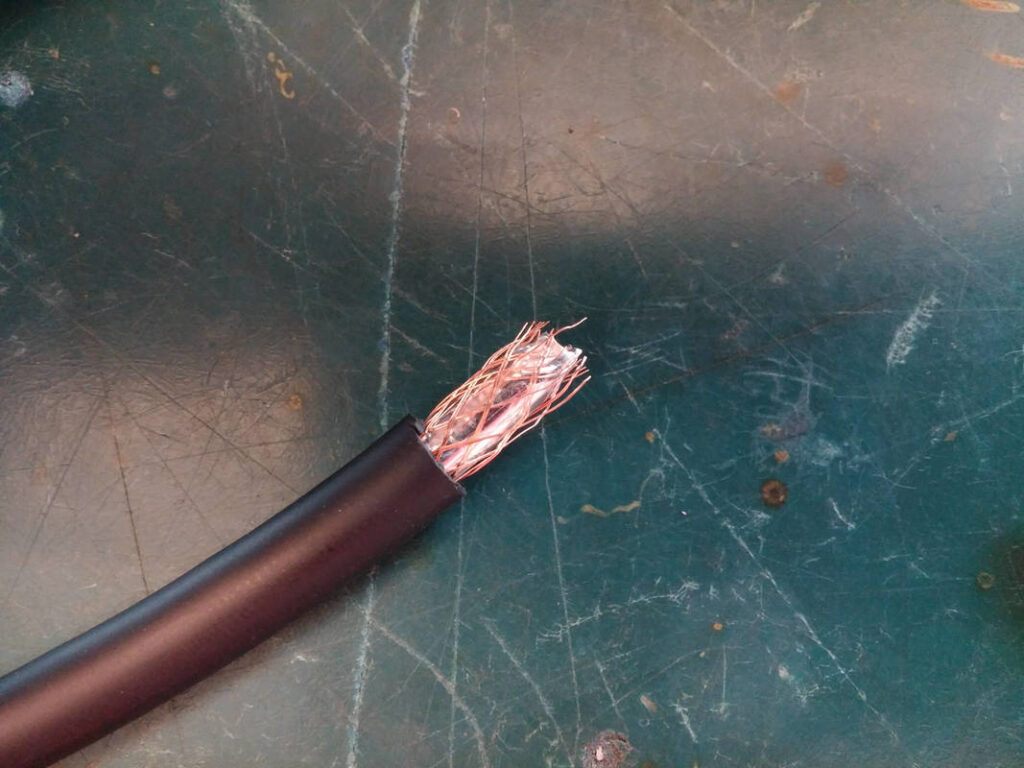
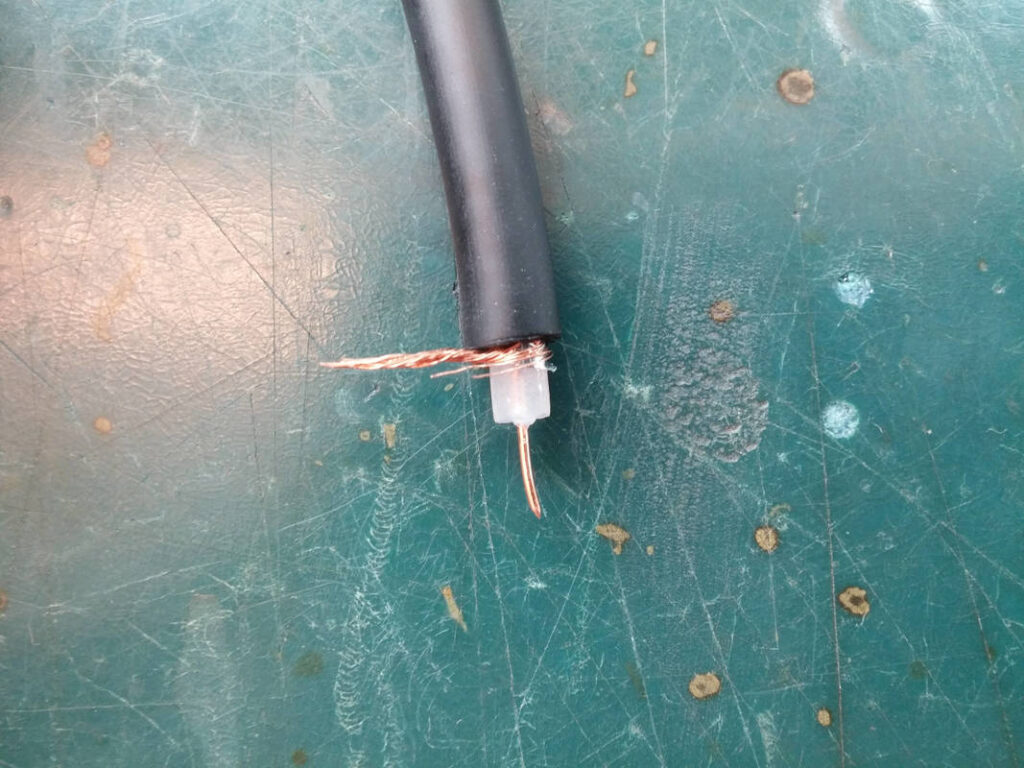
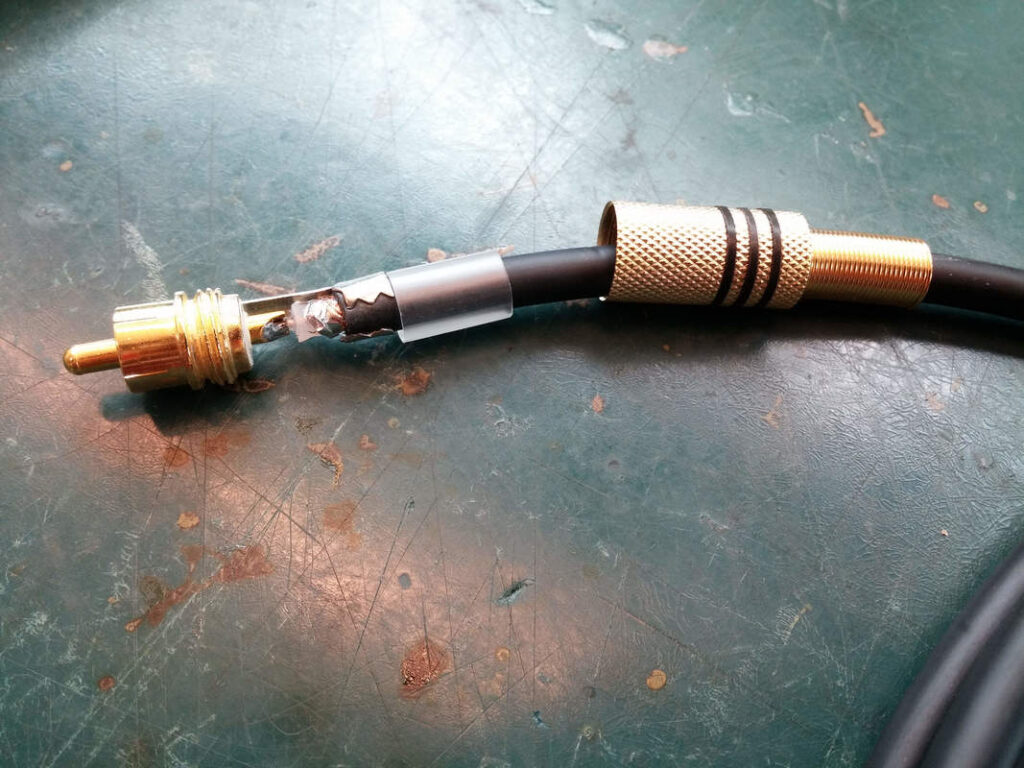
Measure the connector to see how far to strip the coax. do this to ONE side of each cable. Slide a piece of 8mm Ø 50mm length heatshrink and 5mm black or red heatshrink up the coax. Slide the body and internals of the connector onto the coax, and then solder the connector on. If you forget to put any of the bits on…it doesn’t matter actually because the other end of the cable is open…
Here’s what your cables should look like after you’ve finished the connectors and heatshrink on one end. I prefer a heatgun for a clean finish, but you could use a lighter.
Slide a piece of 18mm Ø heatshrink over the cable assembly. If you forget to do this now, you will kick yourself later! Line the connectors up and cellotape the cables together. Feed both cables through your hands, next to each other all the way to make sure that they are exactly the same length, and trim as required. Add the 8mm Ø heatshrink to the other sides of the cables.
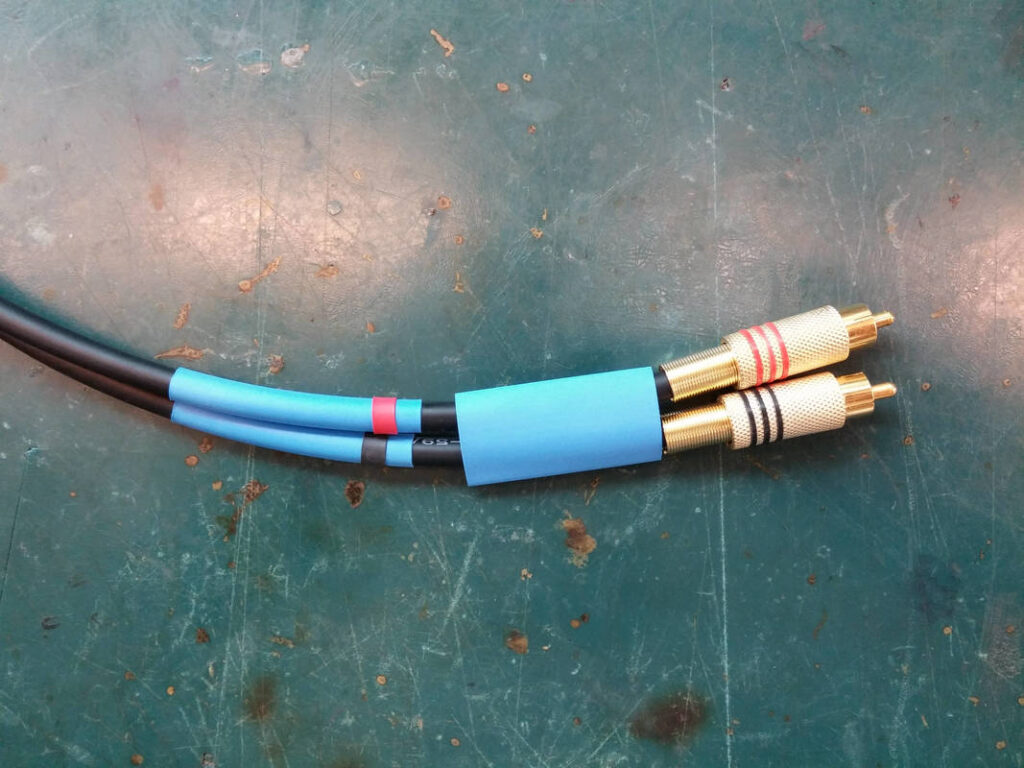
Now get the cable braid. I found that laying the cables out on the floor and removing the cellotape made life far easier. Feed the cable braid over the coax a bit at a time, making sure that the cables aren’t twisted. Patience is a virtue here.
When the braid overlaps the colour-coded heatshrink by around 10mm, stop. Work back, making sure it is tight. Mark the braid at the other end (cut a nick in it) and then slide it off the cable. If you are making more than one cable, slide it all the way off; you’ll need it to measure the other bits. Pull it back down to its original size and then cut it where your mark is. Use a lighter to melt the edges that you’ve cut. Slide it back on, again taking care to ensure that the cables aren’t twisted. After a bit of wiggling and shaking, the cables should be lined up and the braid should be where you want it.
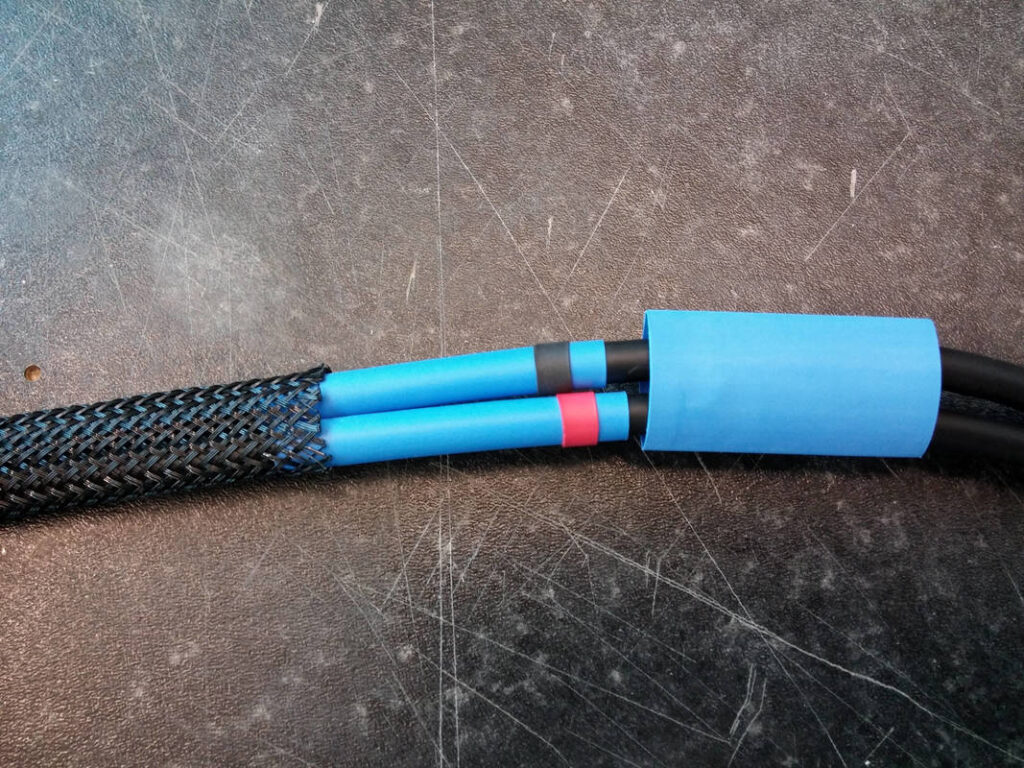
Now place the 18mm Ø heatshrink halfway over the braid and shrink it down. Do the same to the other side.
BE CAREFUL NOT TO MELT THE BRAID! It can happen quite easily; ask me how I know this…
Now just strip the other ends of the coax, slide the connector body and internals on, solder the connectors and then enjoy the aligned electrons, added sonic presence and imaging of…just kidding- you know that’s not really possible, right? Just enjoy your music, and spend the money you’ve saved on a better amp and/or speakers- where it will actually make a difference.