I wanted to design a fume extraction system for the garage because it would be useful when I was spending extended periods of time in there welding and also soldering. The only type of welding I do in there is TIG which generates far fewer gases and particles than MIG or Arc welding, but it is important to still be careful.
Additional considerations when TIG welding aluminium is the generation of ozone, and when TIG welding stainless steel is hexavalent chromium. Another concern is welding galvanized steel- ideally the galvanic coating should be stripped from around the area to be welded as when heated it will release toxic zinc fumes. Safety measures include wearing Respiratory Protective Equipment (RPE) – eg a facemask with FFP3 filter – and ideally Local Exhaust Ventilation (LEV) – a suitably approved extractor fan system.
According to HSE document G100 (General Ventilation): “The rate of ventilation for an area is normally expressed in ‘air changes per hour’, ie the number of times per hour that the entire air volume of the area is changed. The rate selected depends of the type of room and the activity being undertaken. Typical applications range between 5 and 15 air changes per hour”.
With this in mind I measured my garage, and found the volume to be around 52 cubic metres. I subtracted 25% (SWAG), to account for all of the possessions in the garage for a final volume of 39 cubic metres. My chosen fan has two speed settings- on low the unit can move 405 cubic metres per hour and on high it can move 520. dividing these volumes by the room volume gives the following theoretical performance figures:
Low: 10.4 air changes per hour
High: 13.3 air changes per hour
Happy with these predicted performance numbers, I went ahead with the build…
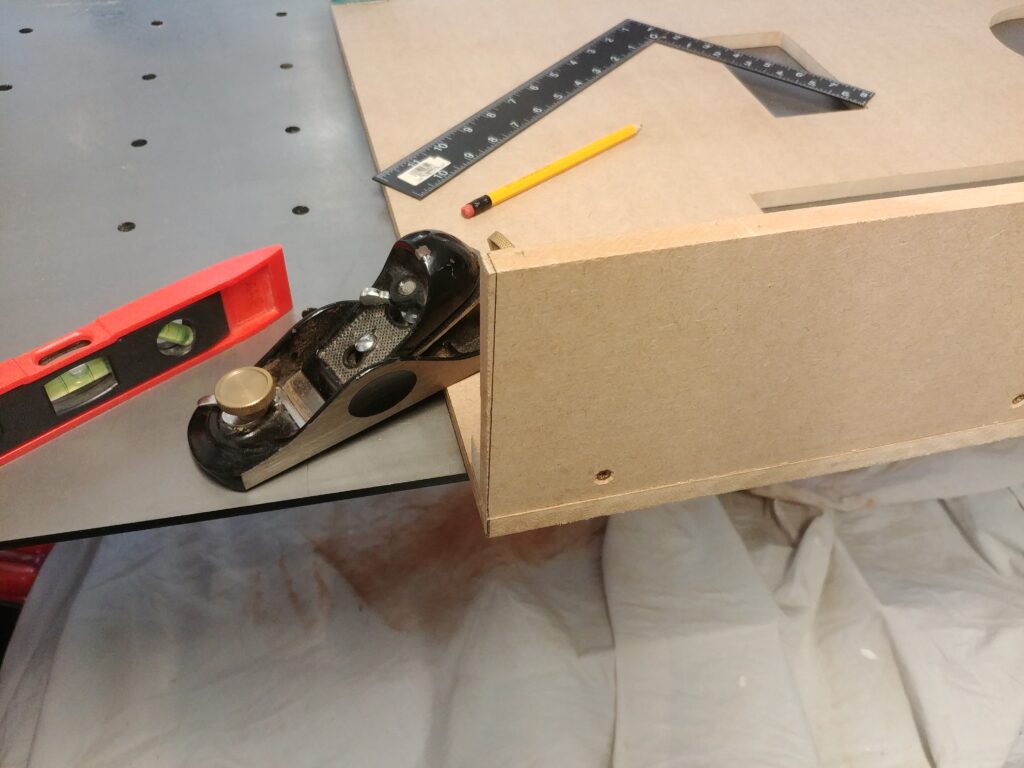
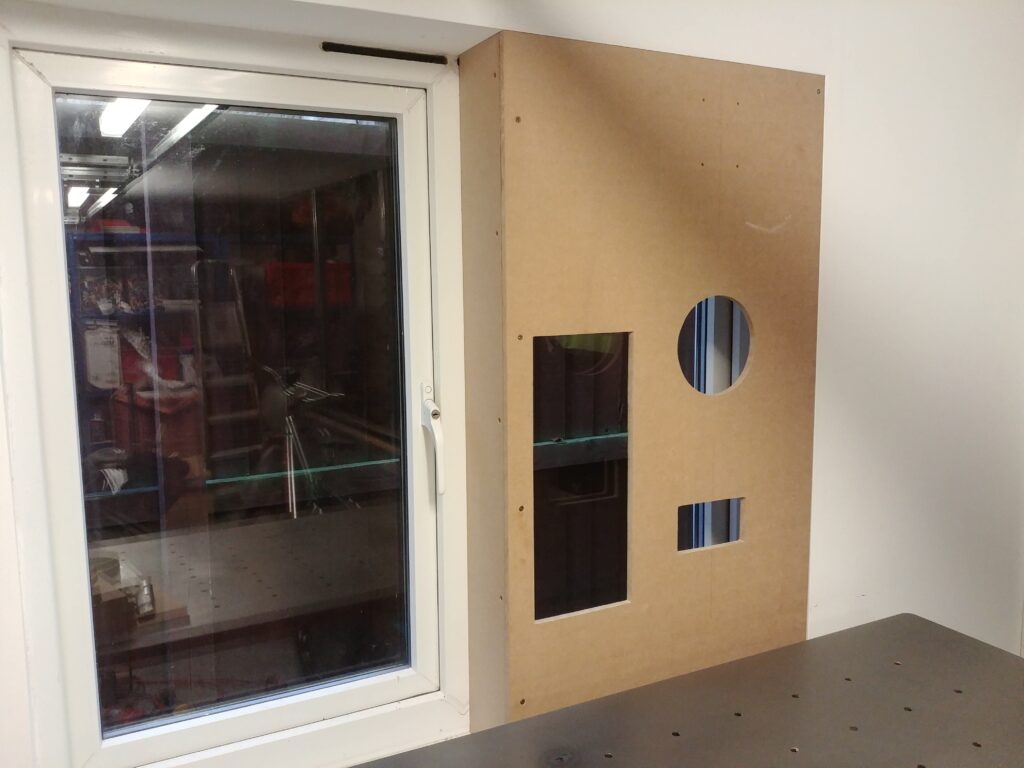
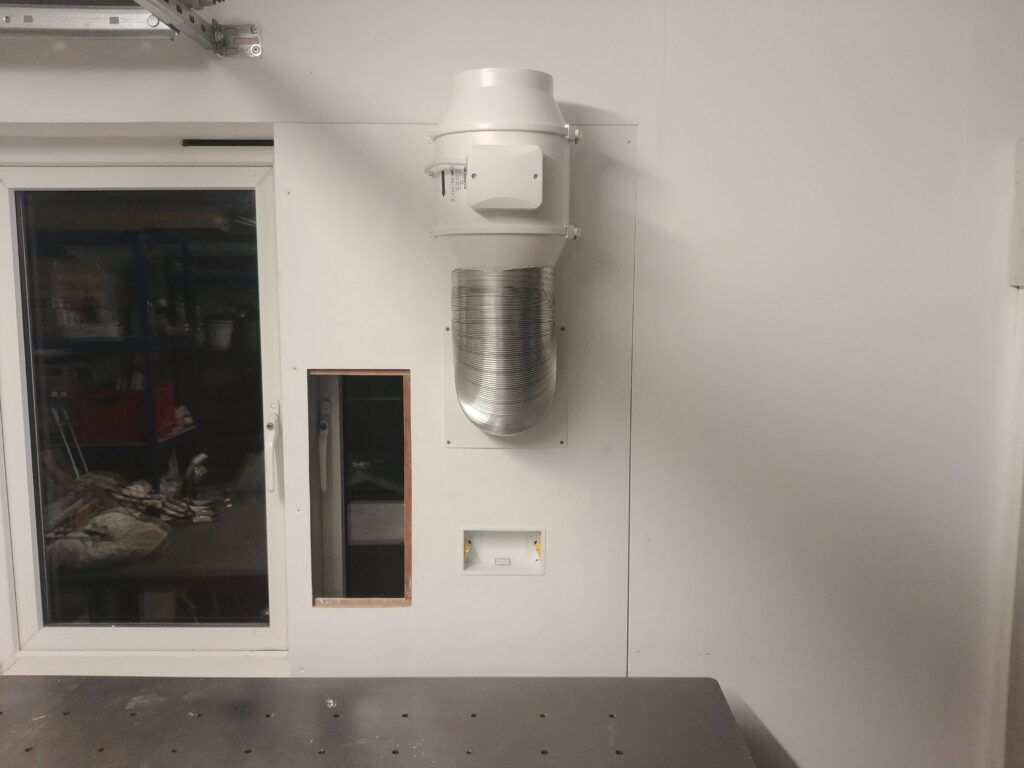
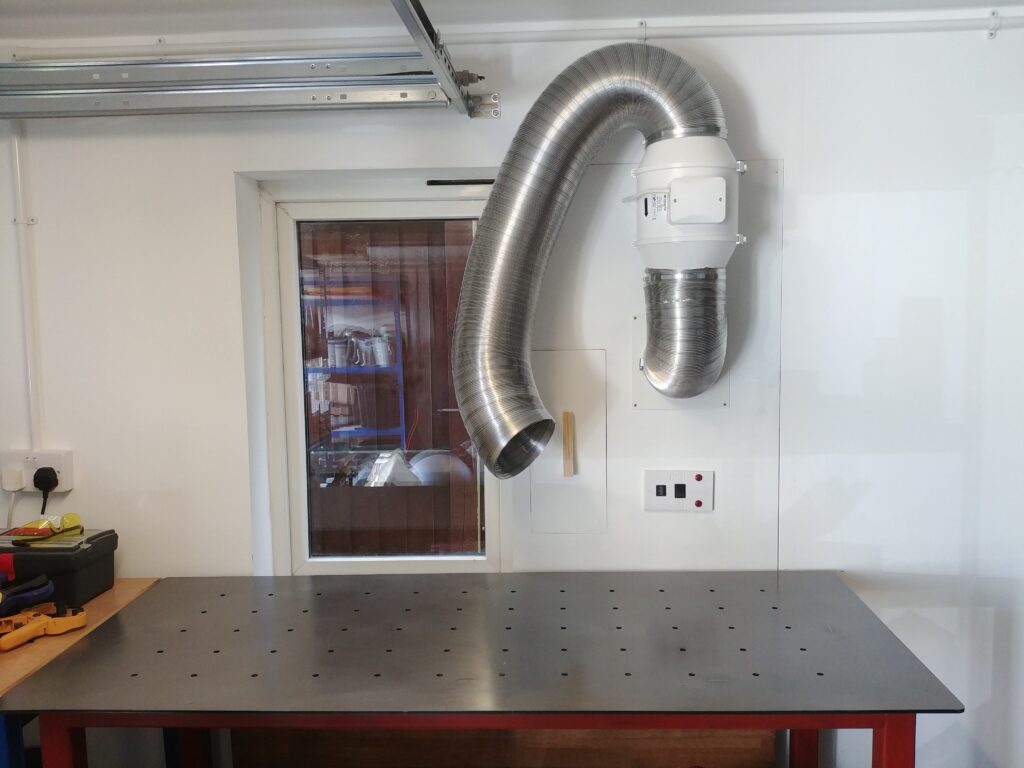
The extraction system is designed to box off one of the windows and fits the opening so well that no fasteners are needed. The window can be opened via a hatch during use to let the fumes vent outside. The main body is made from 12mm MDF and 20mm x 20mm softwood batten.
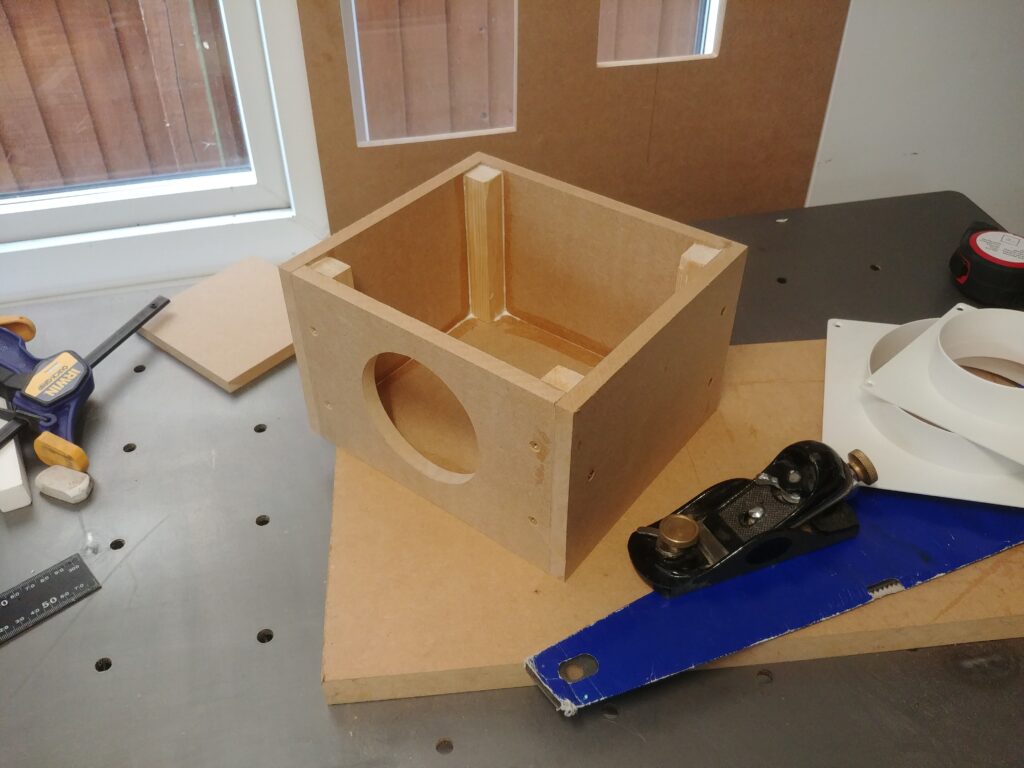
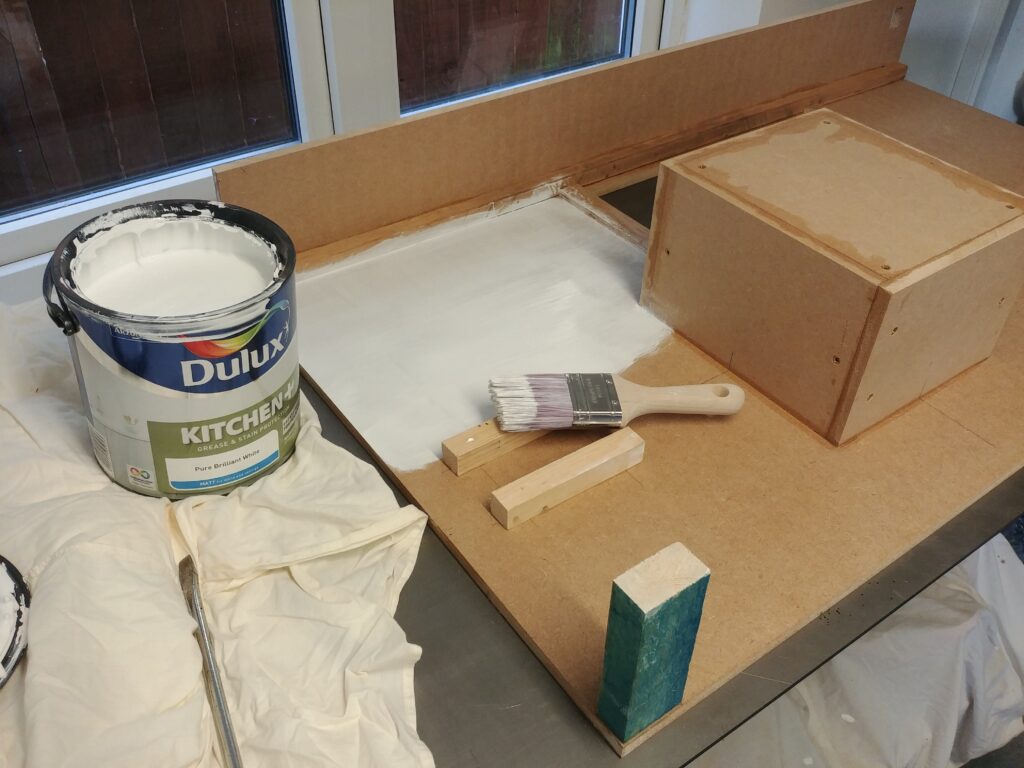
A box was glued onto the back to act as an adaptor and 90 degree direction changer for the 150mm ducting, so that some 100mm flexible plastic hose could be attached and placed outside the window during use. The unit was painted white to match the wall and the fan and ducting was fitted.
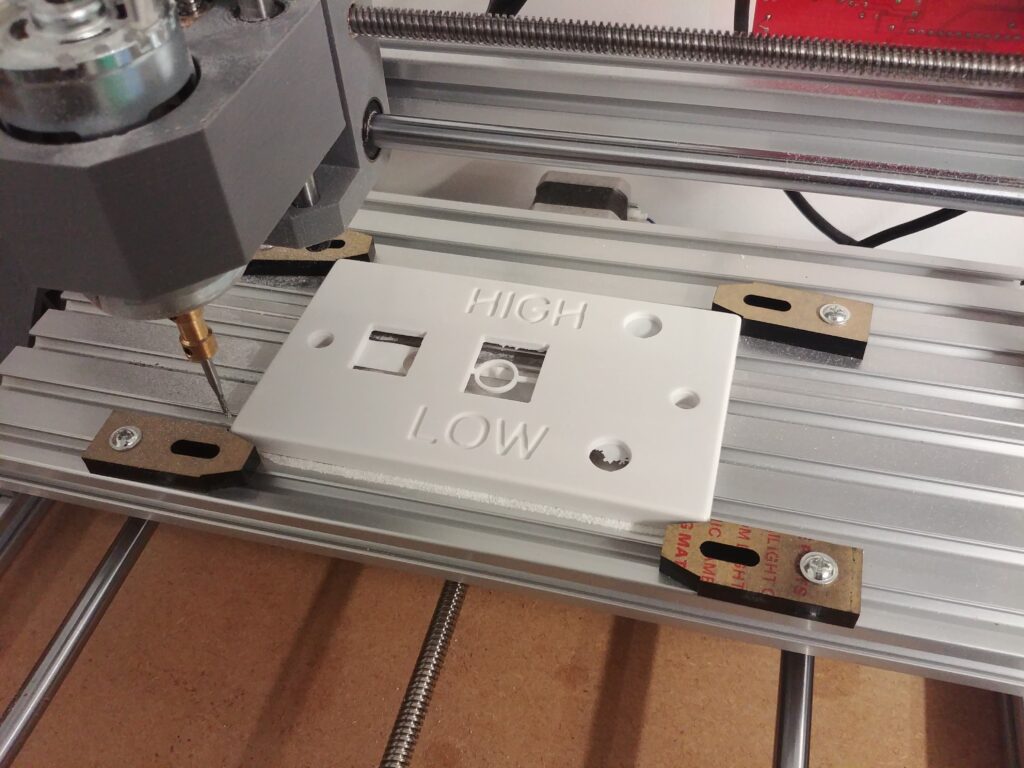
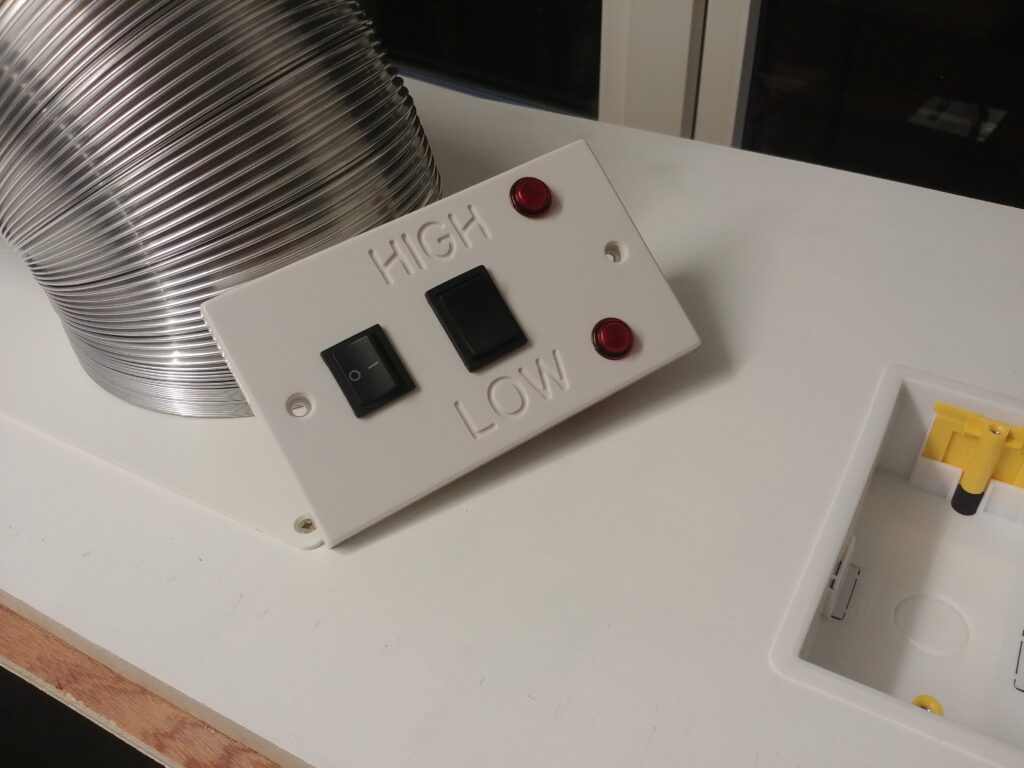
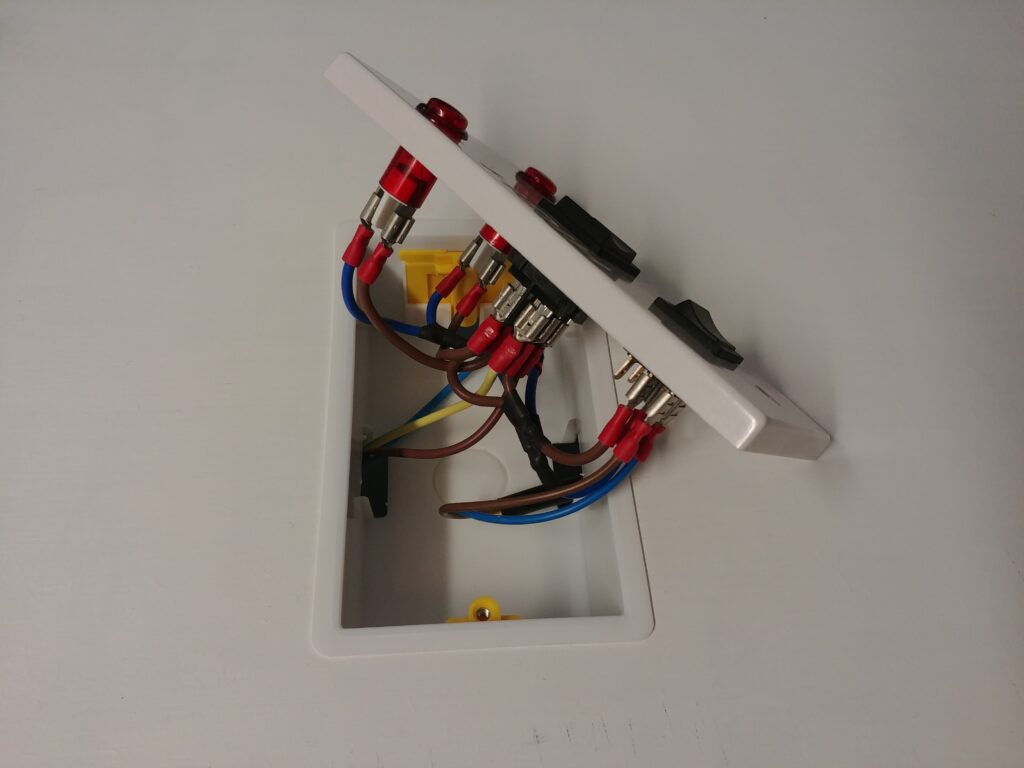
A control panel allows the user to switch power to the unit and select between low and high settings. Bulbs provide a visual indication of what setting has been selected. A blank switch plate was bought and the required holes and writing was cut out on a small desktop CNC. The switch panel was then wired up using custom cabling and crimp connectors.
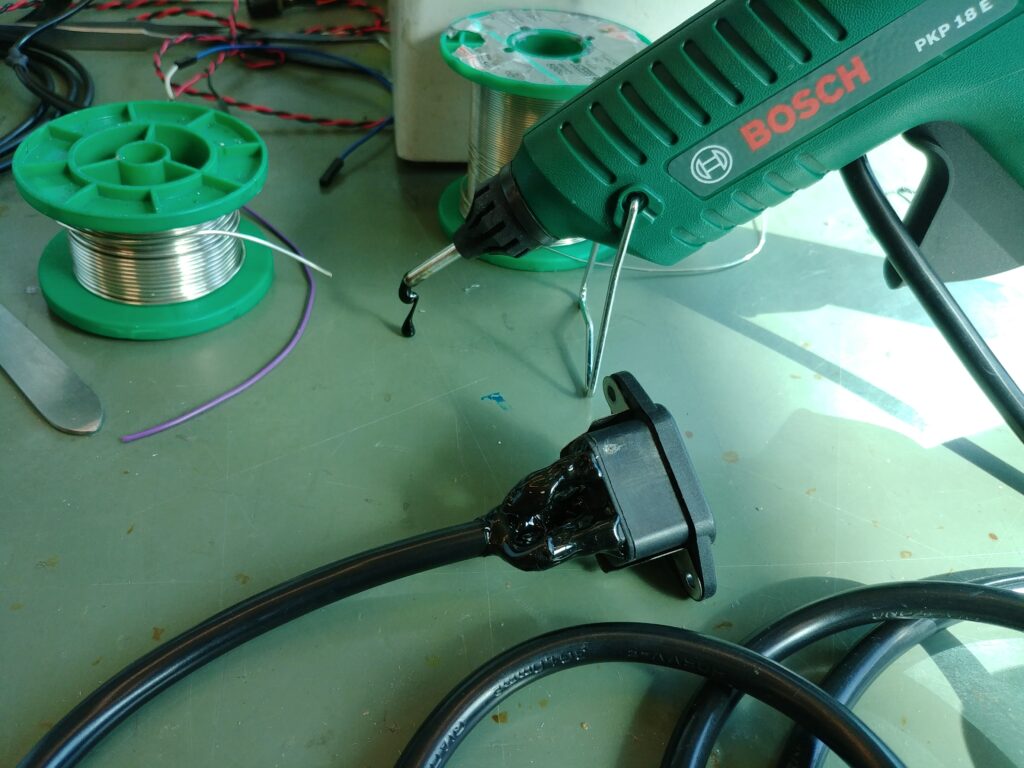
A C14 IEC inlet was salvaged from an old appliance I had waiting to go to the tip, new cables were soldered to it and the back was potted with hot melt glue for safety, and crimps were applied to the other end of the cable. The inlet was fitted to the side of the MDF body and the wiring was completed by routing and securing the cables around the MDF body and connecting the switch panel.
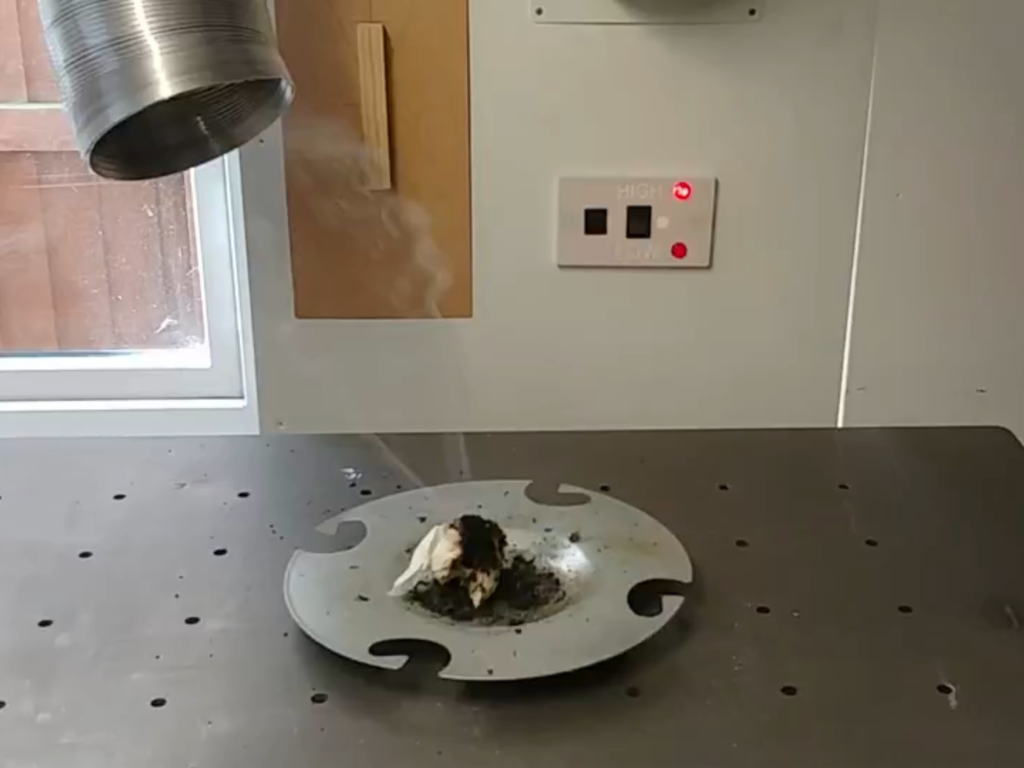
As extractor systems go, I think this one looks pretty good. It seems to work well, it’s not too loud and it’s energy efficient (only 60W on high). The ducting sort of goes where you want – you can bend and stretch it into place, but it can get a bit bouncy if you stretch it out too far. It does a fairly good job of collecting smoke from a distance, but the power drops off rapidly. I wonder if that’s why the flared end these systems typically come with is to help with that? Maybe I’ll make one at some point and see. For now though, I’m happy with it.